Tutorial Customizing Your Windows Desktop for Productivity
How To Organize Your Windows 11 Desktop for Productivity
If youre like most people, your computer is one of your most essential tools for getting things done. However, with so many windows open and apps running, its easy to become overwhelmed and distracted. That's where arranging your Windows 11 desktop for productivity comes in handy.
In this article, well walk you through the steps to optimize your Windows 11 desktop for maximum productivity. Youll learn how to organize your desktop, customize your start menu, and use keyboard shortcuts to get more done in less time. So, lets get started!
Understanding Your Desktop
Before we dive into the tips and tricks, its important to understand the different elements of your desktop. Windows 11s desktop consists of the taskbar, the start menu, and the desktop itself.
- The taskbar is the bar at the bottom of your screen that displays your open apps and system notifications.
- The start menu is the menu that appears when you click on the Windows icon in the bottom left corner of your screen.
- The desktop is where you can place files and shortcuts for easy access.
These elements make up what you see when you first open your computer, and how you use them can greatly affect your productivity. If everything's a mess, it affects how quickly you can work and how organized you feel. Lets look at some ways to organize them for maximum efficiency.
Organizing Your Desktop
Picture yourself settling in for a productive day at work, armed with a strong cup of coffee and a clear plan to tackle a critical project. You power on your computer, only to be met with a cluttered desktop filled with folders, documents, and files, making it nearly impossible to locate the important file you need to turn in.
The state of your desktop is not only distracting but also hindering your productivity. To avoid this unnecessary stress and lost time, take a moment to declutter your digital workspace. A neat and organized desktop is more than just aesthetically pleasing; it sets the tone for a focused, efficient day, ultimately leading to a more productive and successful work life.
Luckily, there are a lot of different ways to organize your desktop. Let's go over some of the most popular options:
- Make folders for your documents, shortcuts, and other files
- Organize the applications you use for work
- Take advantage of shortcuts for apps, websites, and even folders
- Use a custom productivity wallpaper for Windows 11
- Set custom desktop icons
- Use virtual desktops
- Use widgets
1. Create Folders for Organizing Your Documents
Staying organized is key to tackling tasks efficiently. One simple yet effective way to maintain organization is creating well-structured folders for all the files you constantly create, download, and save. This way, you won't waste time searching through a cluttered desktop or digging through unrelated files.
When you create sensible folders like "Work Files" or "Projects," you immediately know exactly where your work-related documents are. This not only saves precious time but also contributes to a streamlined workflow, allowing you to focus on what really matters - getting things done.
To create a folder, right-click on your desktop and select "New" > "Folder." You can then drag and drop files and shortcuts into the folder. Step up the organization game and enjoy the convenience and productivity boost that comes from an orderly digital workspace.
2. Organize Your Applications
If you work with a variety of applications, youll want to make sure that they are easily accessible and organized. Create folders for the different types of apps you use and then place them into the appropriate folders. You could also create desktop shortcuts so that you can quickly access your most used apps.
When you install a new application, it might create its own shortcut on your desktop. More often than not, these shortcuts are unnecessary. To remove an unwanted shortcut from your Windows 11 desktop, simply right-click on it and choose the "Delete" option.
Don't worry - this isn't going to uninstall the software. It's only to remove the app shortcut from your desktop.
3. Set Up Shortcuts for Frequent Tasks
Setting up shortcuts to frequently used tasks is a great way to reduce the time it takes to access them. You can easily create a shortcut by right-clicking on an application and selecting "Create Shortcut." This will place a link on your desktop that you can then click on to open the application.
Shortcuts are useful for quickly accessing programs or applications that you use often, such as word processors and photo editors. They also come in handy when trying to access programs that are buried deep within your computer's file structure.
Did you know? Windows 11 lets you set up shortcuts for websites, too! This way, you can hop online from your desktop and get to work on whatever project you need to do.
4. Set a Custom Wallpaper
If you like things to look great while also serving a good purpose, look into Windows 11 wallpapers for productivity. Many talented creators publish free and paid wallpapers with sections to place your most important shortcuts, as well as reminders of your goals and notes on tasks to complete.
These wallpapers are aesthetically pleasing, but they also provide an interactive way to stay organized that you won't find anywhere else. Plus, with a few simple clicks, you can completely customize your Windows 11 desktop wallpaper to your liking!
Of course, you can make your own wallpaper too. All you have to do is pick an image you like, and draw some areas where you'll place your shortcuts or notes.
5. Customize Your Desktop Icons
Did you know that Windows 11 allows you to set custom desktop icons? With this feature, you can make your desktop look just the way you want it to. You can even upload pictures yourself to give your desktop a personal touch! There's really no limit when it comes to setting a new, customized icon for your desktop apps and files.
By searching the internet, you can find a lot of different Windows 11 icon packs such as Insignia (which even offers social media icons for your shortcuts) or the more playful In Pixelated Icon Set.
Found the perfect icon set for your new, optimized Windows 11 desktop? Let's take a look at how you can change your current icons to your new ones. Here's how to change desktop icons on Windows 11:
- Right-click on your desktop and select "Personalization" from the menu that appears.
- Click on "Themes" in the Personalization settings.
- Scroll down to "Desktop Icons Settings" and click on it.
- Choose a default icon from the list or click "Change Icon" to use a custom one.
- If you want to use a custom icon, click "Browse" and locate the icon pack you downloaded for Windows 11.
- Select your desired icon and click "OK".
- Click "Apply" to save the changes to your desktop.
You can also change the size of your desktop icons to make them easier to see and work with. Right-click on your desktop and select "View" > "Large icons," "Medium icons," or "Small icons" to adjust the size.
6. Utilize Virtual Desktops
Virtual desktops in Windows 11 have become a game changer for individuals juggling multiple applications or projects simultaneously. Windows 11 provides an intuitive way to use virtual desktops. Click the "Task view" button on the taskbar and select "New desktop" to swiftly create an organized space for each project. Use the same button to move between different desktops.
Establishing a balanced and productive work-life environment is crucial for leading a stress-free and efficient professional life. Create separate desktop spaces: one for personal entertainment and leisure apps, and another dedicated solely to productivity-enhancing tasks.
This strategic separation helps minimize distractions caused by messaging apps, social media platforms, and video games. Completely immerse yourself in the task at hand while working. Once the work is complete, switch over to your personal desktop to unwind.
7. Take Advantage of Widgets
Widgets are a new addition to Windows 11, and they can help you stay organized and productive by providing quick access to important information. To access widgets, simply click on the Widgets button on the taskbar, or use the "Windows" + "W" shortcut. You'll see a variety of options for displaying news, weather, and other useful information.
To customize your widgets, click the "Settings" button and select which widgets you would like to see. You can also organize your widgets using drag-and-drop.
Users can also place custom widgets directly on the Windows 11 desktop. While this is not a native feature, third-party apps like BeWidgets and Rainmeter offer this functionality.
Conclusion
In conclusion, arranging your Windows 11 desktop in a way that is conducive to task completion can help you maximize productivity. Utilizing virtual desktops for organization and customizing the start menu with shortcuts will save time navigating around applications and programs. Widgets are also an excellent addition, as they provide quick access to important information without having to search through multiple windows or folders.
With these tips in mind, youll be well on your way to creating a productive environment for yourself! We hope this article has been helpful in your journey to optimize your Windows 11 desktop for productivity.
One More Thing
Were glad youve read this article. :) Thank you for reading.
If you have a second, please share this article on your socials; someone else may benefit too.
Subscribe to our newsletter and be the first to read our future articles, reviews, and blog post right from your inbox. We also offer deals, promotions, and updates on our products and share them via email. You wont miss one.
Related Articles
Tips to Boost Your Productivity at Work 7 Steps to Become More Productive While Working From Home How Sleep Affects Your Work Day and Productivity
55 tips and tricks to make you productive like a boss on Windows 10
Windows 10 includes many great features that let you get your work done faster, but it's not just about the features. Another advantage of the operating system is that you're not limited to do a task in only one particular way. Windows is one of the most versatile operating systems you can find that allows you to accomplish the same tasks in different ways.
On every version of Windows, there is always a way to perform tasks faster or more practical for you. For example, if you are continuously typing, and it's hard to let your hands off the keyboard, you can always use keyboard shortcuts to do a particular action or navigate the operating system. Also, there are a ton of features to keep you productive, connected, and features that can help you delegate certain tasks and even more with Windows 10.
Today, we'll be looking at a few keyboard shortcuts and some tips to help you get things done faster and stay productive throughout your Windows 10 experience.
If you've used Windows 8 in the past, you will probably notice that many of the shortcuts and tips that we'll be seeing today have been previously introduced. However, looking at the fact that many users have skipped Windows 8, and millions of users are now jumping straight to Windows 10, for many, a lot of these tips and shortcuts will be new.
Snap View
Although Snap view was introduced years ago, in Windows 10, the feature has received some improvements. You can now snap up to four apps on your display, and Snap Assist, which will pop up automatically after snapping the first app, will suggest additional running app you may want to snap side-by-side. Below you can find the keyboard shortcuts to use this feature:
- Windows Key + Right arrow: Snap active window to the right side of the screen.
- Windows Key + Left arrow: Snap active window to the left side of the screen.
- Windows Key + Right + Down arrow: Snap active window to the bottom-right corner of the screen.
- Windows Key + Left + Down arrow: Snap active window to the bottom-left corner of the screen.
- Windows Key + Right + Up arrow: Snap active window to the bottom-up corner of the screen.
- Windows Key + Left + Up arrow: Snap active window to the bottom-up corner of the screen.
Virtual Desktops
While most popular operating systems have included the concept of virtual desktops for years, Windows 10 now includes the same feature to allow you group applications on separate desktops making you more productive by keeping you focus on a particular task. You can quickly click the Task View button on the Taskbar to access and manage virtual desktops, but you can also use some keyboard shortcuts to work faster:
- Windows Key + Ctrl + D: Create a new (empty) virtual desktop.
- Windows Key + Ctrl + Left arrow or Right arrow: Switch between virtual desktops.
- Windows Key + Tab: Enter and get out of Task View, and it also works to access the current virtual desktops.
- Windows Key + Ctrl + F4: Close current virtual desktop apps and open windows will merge to the main desktop.
Game DVR
How is Game DVR relevant to productivity? Windows 10 happens to ship with the Xbox app, which includes a game recording feature, and the video recording function can be considered a screencast tool as it also works to record any open application. It's worth pointing out this feature won't work to record activities on the desktop or open windows, such as File Explorer. You can use Game DVR using the following keyboard shortcuts:
All the latest news, reviews, and guides for Windows and Xbox diehards.
- Windows Key + G: Open the Game bar, click the Red button to begin recording active application.
- Windows Key + Alt + R: Start/Stop recording.
- Windows Key + Alt + M: On/Off the microphone during recording.
- Windows Key + Alt + T: Show/Hide recording timer.
Files are stored in your account Captures folder inside of the Videos folder.
Now every time you need to remember how to perform a task or you need to teach how a feature works to someone else, you can use Game DVR on Windows 10 to record quickly and easily a video.
Cortana
Cortana is Microsoft's digital assistant, and even though, you can use it hands-free, you can also perform a few tasks using keyboard shortcuts:
- Windows Key + C: Open Cortana in listening mode.
- Windows Key + S or Windows Key + Q: Open Cortana in search mode.
File Explorer
File Explorer is the one place you can always go to browse and find anything on your PC, from documents and pictures, to OneDrive and network share files, to connected drives and system files. While most people are used to navigating File Explorer using a mouse, you can always use various keyboard shortcuts too. Below you will find the most common keyboard shortcut you can use in File Explorer:
- Windows Key + E: Open File Explorer.
- Alt + Right arrow: Move back between folders.
- Alt + Left arrow: Move forward between folders.
- Alt + Up: Move up a level in File Explorer.
- Ctrl + E: Start a search for a file or folder in File Explorer.
- Ctrl + F: Open search functionality in File Explorer and support applications.
- Ctrl + Shift + N: Create a new folder.
- F2: Rename selected files.
- F5: Refresh active window commonly use to refresh web pages on a browser.
- Alt + F4: Exit/Close apps or windows.
Power-user shortcuts
Although, Windows 10 only brings a small handful of new keyboard shortcuts, the operating system includes most of the shortcuts you got used to in Windows 8.1, Windows 7, and previous versions.
Below, you will find a list of keyboard shortcuts everyone should know to either perform certain tasks or navigate the operating system:
- Windows Key + Tab: Open Task View to view all the running apps. You can also use Alt + Tab to view and switch between apps, or press and hold the Alt, while repeatedly hitting the Tab key to select the app you want to go.
- Windows Key + Comma: Make all the windows transparent to view the desktop.
- Windows Key + D: Minimize all open windows to access the desktop. Repeat shortcut to restore all minimized windows.
- Windows Key + Home: Minimize all open windows except the currently active windows you're working.
- Windows Key + T: Move through icons in the Taskbar running apps will show thumbnail previews of the current running instances.
- Windows Key + 0 through 9: Open a pinned app on the number location in the Taskbar. "0" opens the app located in the 10th position. If you have more than one instance open of a particular app, you can repeatedly use the same keyboard combination to cycle through the instances.
- Windows Key + Shift + 0 through 9: Open a new instance of a running app. Of course, it's only supported on apps that support multiple instances.
- Windows Key + Spacebar: Switch between input languages installed on your computer.
- Windows Key + A: Open/Close Action Center.
- Windows Key + I: Open the Settings app.
- Windows Key + P: Connect to an external display. Options include extend, duplicate, and a second screen only.
- Windows Key + PrtScn: Take a screenshot. Screenshot gets copied to the system clipboard, and image file will save to the Screenshot folder in your local Pictures folder.
- Windows Key + Plus sign or Minus sign: Zoom in/out using the Magnifier built-in tool.
- Windows Key + X: Open the Quick Link menu (commonly known as the Power User menu).
- Windows Key + Shift + Left arrow or Right arrow: Move a window between monitors.
Free up the Taskbar
By default, Windows 10 includes the new search box in the Taskbar that might be taking some valuable space to fit more pinned apps. If you want to reclaim some space right-click on the Taskbar, select Cortana, and choose to Show Cortana icon only. You can also remove the Cortana and Task View buttons from the same Taskbar menu.
Resize two snapped apps at the same time
In Windows 10 version 1511, Microsoft is also adding another improvement to Snap, which is the ability to resize a snapped window while simultaneously resizing any adjacent snapped window. You can try this when you're working with two apps, just position the mouse cursor over the line of the two snapped apps, do a left-click, and drag to the right or left to resize both apps at the same time. To make sure this features is enable, go to Settings > System > Multitasking and turn on When I resize a snapped window, simultaneously resize any adjacent snapped window option.
Use this trick to minimize inactive windows
Left-click and hold the title bar of any window, shake the window and see all the foreground windows minimizing. (This feature was originally introduced in Windows 7).
Clean up your desktop
We tend to save a lot of files and folders on the desktop, but after a while, it becomes too cluttered to the point you can't even see you desktop background image. If you want to keep saving files on this location while keeping the desktop clean, you can quickly hide all the content on your desktop by right-clicking on the desktop, selecting View, and making sure to uncheck the Show desktop icons option.
Pin Recycle Bin to Start for quicker access
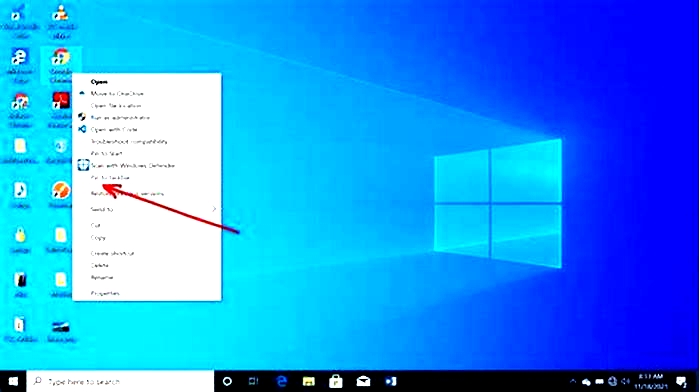
If you decide to hide desktop icons, one thing you can do is to pin the Recycle Bin to Start. Just right-click the Recycle Bin, and select Pin to Start.
It used to be that Windows only allowed you to scroll active windows. Now in Windows 10, you can set an option to scroll both active and inactive windows by just hovering with the mouse cursor over a window. This feature enabled by default, but if it's not, go to Settings > Devices > Mouse & touchpad, and make sure to enable the Scroll inactive windows when I hover over them option.
Pause notifications to focus on your work
If you need concentration and silence during work hours, or you're about to watch a movie, you can open (Windows Key + A) Action Center and click the Quiet hours button to stop notifications temporarily. Unlike quiet hours in Windows 8.x, you can't set how long you want to suppress notifications, you have to go manually back to Action Center and click Quiet hours to re-enable the feature.
Pin specific settings to Start for quicker access
While accessing the Settings app is as easy as using the Windows Key + I keyboard shortcut. Sometimes you also need to have similar quick access to particular sections of Settings to check for updates, personalize your account, change Bluetooth settings, etc. Windows 10 makes it super easy to pin settings to Start. Just open the Settings app, right-click a section you want to access, and click Pin to Start. (Pin settings to Start works with all the main groups and sections of Settings, as such you can pin "Personalization" as well as "Windows Update" inside of "Update & security.")
Quickly open a new instance of an application
If you ever want to open an additional instance of an app quickly, just click the icon on the Taskbar or Start menu with the middle button on your mouse. You can use this action on Microsoft Edge, Chrome, Firefox, File Explorer, Calculator, and other apps that support multiple instances.
Search "My stuff" to actually find files on your PC or OneDrive
By default, search results in Windows 10 are limited and not very accurate, as the operating system tries to include results for all categories, including the web, apps, settings, and files on a small canvas. However, you can get much better results when you click the My stuff button during a regular search. When doing a search on "My stuff", you will get a richer experience with filters, sorting capability, and better results from your PC or OneDrive.
Create reminders using Cortana
One of the best things about Cortana is that it's truly your personal assistant that can do a lot of things for you. If you have a lot of stuff on your plate that you need to get done, you can let Cortana handle your reminders. This ability lets you continue focusing on the work you need to get done. Just follow the steps below:
- Launch Cortana and in the search box type Set reminder and hit Enter.
- Create your reminder and set when you want to get reminded.
- Click the Remind button to complete.
The best part is that the reminder will sync across your devices where Cortana is enabled.
Let Cortana track your packages
While Cortana can automatically track packages from different mail carriers, it can only track packages automatically if the tracking number appears in one of your emails on the Microsoft account you're using in Windows 10. However, you can always add items manually that you want to track using the steps below:
- Launch Cortana and open Cortana's Notebook.
- Scroll down, click Packages and make sure Package tracking cards option is enabled.
- Click Add a package and enter the tracking number for the item.
- Click add to complete.
Now, you should see package tracking cards every time you open Cortana with the most up to date status.
Send text messages using Cortana
If you use a Windows 10 Mobile handset, you may not know that you can enable Missed call notifications on your phone and on your PC running Windows 10 version 1511 to get notifications from missed calls. But this feature also allows you to send SMS messages from your PC without you having to reach your phone -- just follow the steps below:
- Open Cortana on you PC and phone, go to Cortana's Notebook, and on Settings, check that you have Missed call notifications.
- Open the search box on your computer, type Send text, and hit Enter.
- Click the + to add a contact and type your message.
- Click the Send button.
Use Cortana for quick math and conversions
Instead of opening the Calculator app or going online to perform a calculation or conversion, you can always type in the Taskbar search box what you need to know to get instant answers, such as "49 * 34.7" or "72 Fahrenheit to Celsius". (Remember that these are just a few examples to help you stay productive, but you always ask Cortana anything.)
Keep in mind that we're not including the entire library of keyboard shortcuts or tips, we're only sharing the ones we're considering useful to make you a little productive.
Do you have a favorite keyboard shortcut or tip that helps you to be productive using Windows 10? Tell us in the comments below.
More Resources
If you want to see more how-to for Windows 10, make sure you check the following resources:

