The Ultimate Guide to Choosing a 3D Printer for Beginners
3D Printing for Beginners: Ultimate Guide to FDM Printers
Whether youre new to 3D printing or going back to the basics, our 3D printing for beginners guide covers everything you need to get started with 3D printing.
Our guide primarily covers FDM 3D printing. But well briefly cover other printing technologies to give you a good overview of the hobby 3D printing market.
Now, lets get started!
What is 3D Printing?

3D printing is a process that creates physical objects from digital models. The method of 3D printing is called additive manufacturing, where objects are built layer by layer.
Each layer is a thinly sliced cross-section of the object. Objects print by building layer after layer.
3D printers can use various materials, such as plastic, metal, or even food. 3D printing starts with a digital file, which serves as a blueprint for the final object.
3D printing allows you to create complex objects with less waste than traditional manufacturing. 3D printers are commonly used for rapid prototyping because they can quickly produce complex models in a short period of time.
Because 3D printing creates objects in layers, the finished product is often of lower quality than traditionally manufactured products.
Understanding 3D Printing Basics

In this section, youll learn about the basics of 3D printing.
Its essential to understand the types of printers and printing technology before diving into the world of FDM 3D printing.
3D Printing Technologies
Various types of 3D printers are available, each with its unique printing technology.
Three of the most common 3D printing technologies are:
- Fused Deposition Modeling (FDM) printers: FDM 3D printers are the most popular 3D printers on the market. FDM 3D printers are fed by a spool of filament thats fed through to the extrusion head and print nozzle. The 3D printing filament is heated in the printer nozzle to be soft enough to fuse to the previous layer.
- Stereolithography (SLA) printers: SLA 3D printers were the worlds first 3D printing technology. SLA printers use mirrors to move a mirror across a vat of resin rapidly. The lasers cure the liquid resin layer by layer. After a layer prints, the print bed rises along the X-axis to start the next printing layer.
- Digital Light Processing (DLP) printers: DLP 3D printers work similarly to SLA 3D printers, except a DLP printer uses a digital light projector rather than a laser. The projector flashes a single layer at a time to cure each layer of resin. DLP 3D printers are generally faster than SLA printers because each layer takes the same time to print, regardless of the models size.
Applications of 3D Printing
3D printing has various applications across different industries. Some popular use cases include:
- Rapid prototyping: 3D printing has revolutionized rapid prototyping by allowing inventors and designers to create prototypes at low cost quickly.
- Education: 3D printers are becoming a fixture of schools and learning. They bridge the gap between theory and real-world applications and provide students with fun learning.
- Construction: 3D printing applications in construction include concrete extrusion, additive welding, powder bonding, and more. The technologies allow faster construction, lower labor costs, and less waste.
- Hobby: If youre reading this post, youre most likely using 3D printing as a hobby. Hobbyists use 3D printers for various applications, including creating tabletop games, art, jewelry, cosplay, and home decor.
Setting Up Your 3D Printer

Choosing a 3D Printer
Before you begin, choosing the right 3D printer for your needs is essential.
Start by researching various models, considering factors such as price, build volume, ease of use, and desired print quality.
First, youll need to consider what youll be printing. If youre printing miniatures or high-detail prints, youre better off with a resin 3D printer. Remember, resin printers are harder to work with, and 3D printing resin is toxic.
If youre looking for a general-purpose printer or printing larger items, stick with FDM 3D printers. They are by far the most popular printers on the market. Youll find plenty of support from the online community.
FDM 3D printers are also cheaper than resin 3D printers and boast larger build volumes for the price. That means you can make larger prints.
Once youve chosen between resin or filament printing, youll want to start looking at your options.
With thousands of 3D printers on the market, it can be overwhelming to choose the right one.
The best 3D printer for beginners is Crealitys Ender 3. Its easy to use, low cost and has plenty of online community support if you need assistance.
If youre looking for more options, check out our guide on the best 3D printers to help you choose the right 3D printer for your needs.
Printer Assembly
Once youve chosen your 3D printer, its time to assemble it.
Carefully follow the instructions and ensure your workspace is organized and free from clutter or hazards.
If you encounter difficulties, there are plenty of YouTube videos with step-by-step assembly instructions for most 3D printers.
Calibration and Configuration
After assembling your printer, calibrating your new 3D printer is crucial for accurate and smooth printing.
- Level the print bed to ensure that the first layer adheres properly.
- Adjust the extruder e-steps to ensure the filament feeds correctly and consistently.
- Calibrate the flow rate to ensure that the printer extrudes the correct filament amount.
- Update your printers firmware to ensure the latest safety features are installed.
Materials for 3D Printing
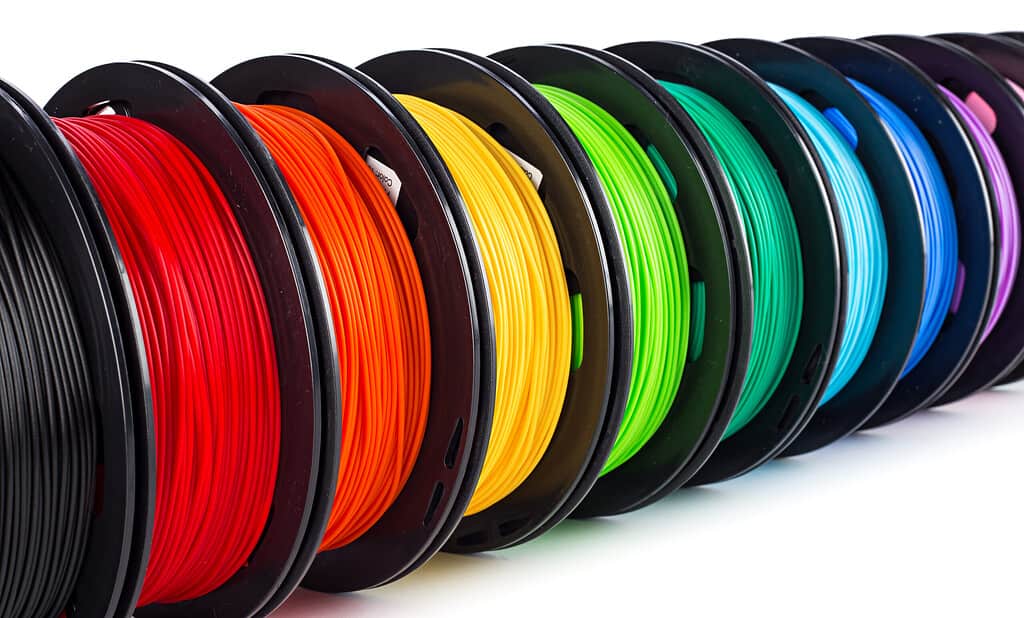
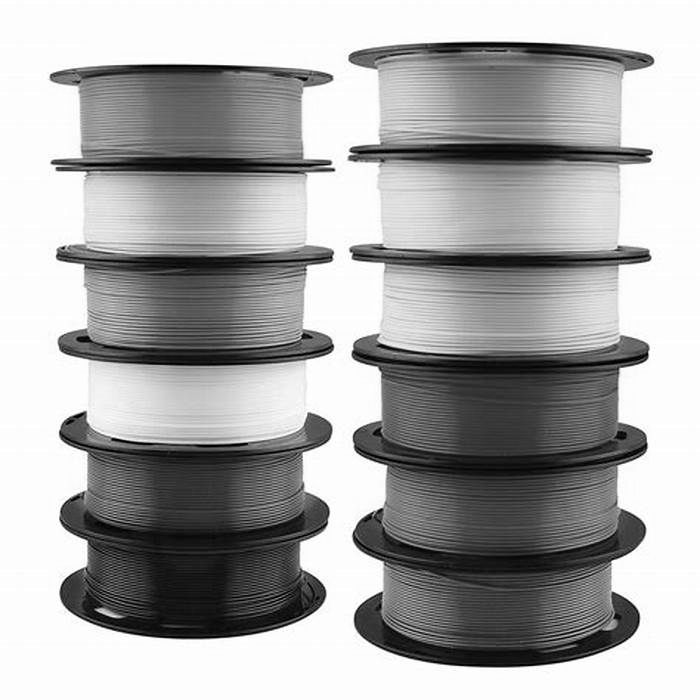
Various filament materials are available for 3D printing, each with unique properties and characteristics. Here are some common 3D printing materials:
- PLA (Polylactic Acid): PLA is the most popular 3D printing filament. We recommend beginners stick with PLA filament because its easy-to-print material, available in a wide range of colors, and relatively inexpensive.
- ABS (Acrylonitrile Butadiene Styrene): ABS is a strong and durable material commonly used for functional parts, such as automotive parts and toys. ABS filament is much more challenging to print than PLA and emits fumes when heated.
- Nylon: Nylon filament is strong and flexible. The filament is commonly used for mechanical parts, such as gears and hinges. It is more challenging to print than PLA and ABS and requires a higher printing temperature.
- PETG (Polyethylene Terephthalate Glycol): PETG filament is a strong and durable material commonly used for functional parts and outdoor applications. It is relatively easy to print and has good layer adhesion. Its often considered an in-between of PLA and ABS. Because it is easy to print and offers some of the strength and durability properties of ABS plastic.
- TPU (Thermoplastic Polyurethane): TPU is a flexible and rubber-like material commonly used for phone cases, gaskets, and other flexible parts. It is more difficult to print than other filaments and requires a slower print speed.
- PC (Polycarbonate): Polycarbonate filament is a strong and heat-resistant material commonly used for automotive parts, medical devices, and other high-stress applications. It requires a high printing temperature and a heated bed.
We recommend beginners stick with PLA filament because its the easiest filament to work with. And because spools of PLA material are relatively cheap, its great to practice with as you develop your skills in 3D printing.
PLA filament also has a low melting point, making it compatible with nearly every FDM 3D printer.
As you become more proficient with 3D printing, you can upgrade to more complex material types.
Before you think about printing complex filaments, its essential to check your 3D printers compatibility. Filaments like ABS, PETG, Nylon, TPU, and PC require higher printing temperatures. If your hot end or nozzle cant reach the high print temperatures, your printer cant print more difficult types of materials.
You may need to upgrade your machine or purchase a higher-end printer to work with more difficult filaments.
Purchasing an enclosure when working with ABS is essential to prevent warping and shrinking.
Preparing Your 3D Model

Where Do You Find 3D Models to Print
Before you can start creating, youll need a 3D model ready for your printer to make.
With the popularity surrounding 3D printing, there are millions of models and digital designs available online for you to download and print. Here are some of the most popular sites to find 3D printing files:
You can also create your own 3D models using 3D modeling software or CAD (computer-aided design) programs.
Modeling Software and Platforms
Numerous CAD softwares and platforms are available to help you bring your ideas to life.
Some popular options for creating 3D objects include Tinkercad, Fusion 360, Blender, and SolidWorks.
| Software | Level | Price |
|---|---|---|
| Tinkercad | Beginner | Free |
| Fusion 360 | Intermediate | Free for personal use |
| Blender | Advanced | Free |
| SolidWorks | Advanced | Paid |
These 3D design softwares offer user-friendly interfaces, tutorials, and communities to help you master the skills to create your 3D objects.
Preparing and Exporting STL Files
Once you have completed your 3D model, youll need to export it as an STL (Standard Triangle Language) file. The STL file type is the most commonly accepted file for 3D printing slicing software because it represents your models geometry with a series of interconnected triangles.
STL files simplify your 3D model data, making it easy for your 3D printer to read and replicate.
Some important considerations for your STL file:
- Check if your model is watertight with no gaps or holes.
- Save your 3D model in the proper units (millimeters, inches, etc.) according to your 3D printers specifications.
- Find the option to export in your CAD software as an STL file.
- Choose an export resolution that balances your projects detail and file size.
Now that youve prepared your 3D model, you can move on to the next steps and slice your file.
Slicing Software and Print Settings

To prepare your model 3D printing, you first need to familiarize yourself with slicing software.
A slicer is a 3D printing program that converts digital 3D models (usually in STL file format) into instructions for your 3D printer. The instructions are given in the form of G-code. G-code is a list of instructions that tell your 3D printer how to build your model.
Cura is the most popular slicing software. But there are dozens of slicers you can use, including:
- Ultimakers Cura (most popular)
- PrusaSlicer (best for Prusa 3D printers)
- Simplify3D
- ChiTuBox (for resin printing)
Once youve installed your preferred slicing software, follow the prompts to configure the software with your printer.
Most slicing software has preset profiles for popular 3D printers. You can use the presets to get good results. However, familiarizing yourself with the slicer settings can help you fine-tune your printing.
Slicer Settings

Slicing software works by cutting your CAD model into horizontal layers and determining the path your 3D printers print head follows to build your model.
There are dozens of settings and options to fine-tune your 3D printer. Understanding how these settings can impact your print quality and time is essential.
Covering all of the options requires a full guide to 3D printing slicing software. Below are some of the most basic configurations you need to know to get started with 3D printing:
- Layer height: Layer height is measured in millimeters and determines the thickness of each layer. A smaller layer height will result in higher-resolution prints and longer print times. In contrast, larger layers print faster but at a lower quality. A layer height of 0.12 mm to 0.2 mm is best.
- Infill: 3D printing infill settings determine the internal structure of your print. It is typically expressed as a percentage, representing the material used inside the object. Higher infill settings strengthen your prints and increase printing time and material usage. An infill percentage of 15-20% works well for most models. You can also select different infill patterns. Zig-zag and line infill patterns print the fastest, while cubic and gyroid infill patterns are the strongest.
- Print speed: Print speed determines how fast your print head moves while extruding material. Faster print speeds can save time but may sacrifice print quality, while slower speeds can produce higher-quality prints at the cost of additional time. The best setting depends on your 3D printer. A speed of 60-90mm/s is best for standard printers, while CoreXY printers can handle speeds of up to 500mm/s.
- Supports: Slicing programs are essential for determining which areas of your print require support. Supports are critical for complex models and geometry. Without supports, the printhead may extrude filament over an open area on sections that have overhangs. All slicing software offers standard support settings. But Curas tree supports are the best support type. Tree supports use less material, print faster, and create fewer surface imperfections.
- Nozzle temperature: Nozzle temperature is the temperature at which the filament extrudes. The ideal temperature depends on the type of filament you use. Its best to check the filament roll or packaging and use the manufacturers recommended nozzle temperature as a starting point.
- Bed temperature: Most 3D printers have a heated build surface. Setting the bed temperature helps with bed adhesion, ensuring your prints stick to the bed while printing. Like nozzle temperature, its best to use the filament manufacturers guidelines as a starting point.
- Retraction speed and distance: The retraction settings are essential to prevent stringing. Stringing occurs when the printer drips melted filament while moving between different parts of the print. Retraction speed and distance settings determine how much filament retracts when the printer moves between open spaces and how quickly it is re-extruded when needed. Set a retraction distance of 1-5mm and a retraction speed of 20mm/s if your printer has a Bowden tube. If your printer uses a direct drive extruder, you can use a retraction distance of 1-2mm and a retraction speed of 30mm/s.
Once youve sliced your 3D model, you can save it to the SD card or USB. If your printer is WiFi-connected, you can transfer the sliced file to your machine over WiFi.
Starting Your 3D Print
Now that youre file is ready to print, its time to prepare your 3D printer.
Loading Filament
Before you can begin printing, youll need to load the filament spool. Heres how:
- Choose the filament type (such as PLA or ABS) appropriate for your project.
- Heat the extruder to the filaments recommended print temperature.
- While the extruder is heating, insert the filament into the extruder feed.
- Once the heated extruder has reached the target temperature, gently push the filament into the extruder until you see the filament coming out of the nozzle.
- Clean up any excess filament from the nozzle before starting your print.
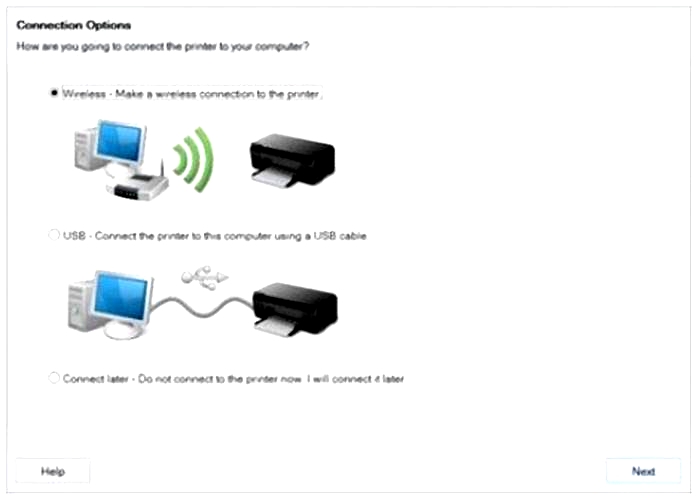
Using SD Card or WiFi
Depending on your printers capabilities, you can transfer your 3D model to the printer using an SD card or WiFi connection.
SD Card or USB:
- Save your 3D model as a .gcode file on an SD card.
- Insert the SD card into the designated slot on your 3D printer.
- Select the .gcode file from the SD card using your printers navigation menu and start the print.
WiFi:
- Connect your printer to your WiFi network.
- Open your printers software or a slicing program on your computer.
- Load the 3D model and slice it to create a .gcode file.
- Select your printer settings from the software and send the file to the printer.
- Once connected, start the print from your computer or the printer itself.
Troubleshooting Tips

Unlike the movies, 3D printers arent a set-it-and-forget-it solution to creating objects. Despite your best efforts, you will eventually encounter print failures and defects.
Here are some tips to fix common 3D printing issues.
- Warping: Warping is when the corners of the print curl up. Warping is caused by the print detaching from the print bed during printing. You can fix 3D print warping issues by increasing the bed temperature, using a heated bed, applying adhesive to the bed, or using a brim or raft to increase bed adhesion.
- Stringing: Stringing occurs when the printer drips molten plastic while moving between different parts of the print. It gives the appearance of strings or webs between surface areas. You can fix 3D printer stringing by adjusting the retraction settings, reducing the print temperature, or increasing the print speed.
- Layer shifting: Layer shifting is when the 3D print layers are misaligned, resulting in a skewed or distorted print. You can fix layer shifting issues by adjusting the tension on the belts and pulleys, ensuring the print bed is level, or reducing print speed.
- Under-extrusion: Under-extrusion is when the printer does not extrude enough filament, resulting in gaps or holes in the print. To fix under-extrusion issues, check the nozzle for clogs, increase the print temperature, or adjust the extrusion multiplier.
- Over-extrusion: Over-extrusion is when the printer extrudes too much filament, resulting in a blobby or messy print. To fix over-extrusion issues, reduce the print temperature or adjust the flow rate or extrusion multiplier.
- Z-banding: Z-banding occurs when the layers of the print are not level, resulting in visible lines or bands on the print. You can fix Z-banding by leveling the print bed, reducing print speed, or lowering the print acceleration settings.
- Elephants foot: Prints develop an elephants foot when the bottom layers of the print appear squished together, resulting in a wider base than intended. You can fix elephants foot by increasing the print bed temperature, reducing the print speed, or adjusting the first layer height.
- Blobs and zits: Blobs and zits are small bumps on the prints surface, usually caused by excess filament oozing out of the nozzle. You can fix blobs and zits by adjusting the retraction settings, reducing the print temperature, or increasing print speed.
Remember, troubleshooting print failures is part of the learning process, and with a bit of patience and practice, youll be able to master this hobby.
Ensuring Safety While Printing
Safety is a priority when working with 3D printers. 3D machines are a lot of fun, but they are inherently dangerous as youre dealing with heated components and sometimes hazardous materials.
Here are some safety measures to keep in mind:
- Ventilation: Proper ventilation is essential, especially when using materials like ABS or resin, emitting harmful fumes during 3D printing. Ensure your workspace has good airflow, or use an enclosure with active filtration.
- Fire Safety: Keep a fire extinguisher nearby, and never leave your printer unattended. FDM 3D printers generate heat, and in some cases, fires can occur. Regularly updating your printers firmware is also important, as newer software versions provide better protection against thermal runaway.
- Handling Hot Parts & Materials: Use caution when handling the nozzle, build plate, and printed parts. Use tools like tweezers and heat-resistant gloves to protect yourself. Wait for the parts to cool down before handling them whenever possible.
- Working With Advanced Materials: Some materials, like UV-cured resin, require special handling and safety precautions. Be sure to research and follow the manufacturers guidelines.
By taking the necessary safety measures and being aware of potential risks, you can enjoy 3D printing while protecting yourself and your environment.
Post-Processes Your Prints
After your 3D print job is complete, there are still a few essential steps to finalize your physical object. Post-processing is the final step in the 3D printing process.
Below are some steps to take to improve the final finish of your prints.
Removing Supports

When your print requires support structures, the first step is to carefully remove the supports. Use a pair of pliers or a small spatula to gently pry away the supports from your object.
Be cautious not to break or damage your print.
Smaller pieces might need tweezers or a hobby knife for precise removal.
Its a good idea to wear puncture-resistant gloves and safety glasses. The sharp support structures can fly off the print and into your eyes if youre not careful.
Finishing Techniques
Once you remove the supports, you can use several finishing methods to improve the appearance and durability of your 3D-printed object.
Depending on your potential applications and desired aesthetics, these techniques can be simple or more advanced.
- Sanding: To remove large imperfections, begin by sanding your print with coarse grit sandpaper. Gradually work up to a finer grit for a smoother surface. If your object has intricate details, be careful not to damage them during the sanding process.
- Filling: If gaps or irregularities exist in your print, you can use a filler material like wood filler or bondo to smooth out the surface. Apply a small amount of filler to the affected areas and let it dry. Once dry, sand the excess filler to achieve an even finish.
- Priming and Painting: To give your 3D print a polished appearance, apply a primer to the surface. Primer allows the paint to adhere evenly and fill in any remaining imperfections. We recommend using a filler primer to hide layer lines and other imperfections better. After priming, you can paint your object using acrylic or enamel paints. Apply thin, even layers and allow each coat to dry before adding another.
- Vapor smoothing: You can smooth ABS prints using a process called vapor smoothing. The process creates a smooth, glossy finish on your 3D print and does an excellent job of removing layer lines.
As you gain familiarity with 3D printing and its various applications, you can explore other post-processing techniques and a range of materials to achieve the perfect finish for your projects.
Remember to have fun experimenting and enjoy bringing your creations to life.
3D Printer Maintenance

Maintaining your 3D printer is crucial to ensure its longevity and the quality of your prints. Here are some essential maintenance tips for beginners:
- Keep your 3D printer clean: Dust and debris can accumulate over time, affecting your printers performance. Regularly inspect your printer for any dirt and filament residue. Use a soft brush or compressed air to remove dust.
- Lubricate the moving parts: Smooth movement is vital to properly function your 3D printer. Keep the linear rails, lead screws, and bearings lubricated with a suitable lubricant to minimize wear and ensure smooth operation.
- Inspect the belts: Check the tension of your printers belts and make sure they are tight enough. Loose belts can cause inaccurate prints, while overly tight belts can cause unnecessary strain on the motor.
- Check the nozzle: Regularly inspect the nozzle for any signs of clogging or wear. Clean the nozzle with a brass brush or cleaning filament when necessary, and consider replacing it if it shows signs of wear.
- Monitor the bed leveling: A properly leveled bed is crucial for proper adhesion and print quality. Regularly level your 3D printer bed and make any necessary adjustments to maintain optimal printing conditions.
- Upgrade firmware and software: Keeping your 3D printers firmware and slicing software up to date ensures you get the most out of your device. Check for updates periodically and install them as needed.
These essential maintenance tips will keep your 3D printer in top condition and continuously produce high-quality prints. Happy printing!
Filament Storage
Proper filament storage is essential for maintaining the quality and longevity of your 3D printer filaments.
Most 3D printer filaments are hygroscopic, which means they absorb moisture from the air. Moisture absorption can cause the plastic filament to swell or degrade over time, impacting its print quality and performance.
To prevent issues caused by wet filaments, store your filaments in a dry and cool environment. One method you can use is sealing your filaments in vacuum bags, which helps keep moisture at bay.
Plenty of filament storage solutions are available, ranging from DIY options to ready-made products. Some popular options include:
- Filament racks: These are handy for organizing and displaying your filament spools.
- Storage containers: Invest in large airtight containers with built-in desiccant packs to control moisture. Placing your filaments inside these containers helps protect them from humidity and dust.
If your filament has absorbed moisture, you can dry wet 3D printing filament in a dehydrator, oven, or specialty filament drying box.
Remember, the goal is to keep your filament dry, dust-free, and organized. With these solutions in place, youre well on your way to maintaining an effective storage system for your 3D printer filaments, ensuring quality prints and a smooth 3D printing experience.

