The Beginner s Guide to Using a DSLR Camera in Manual Mode
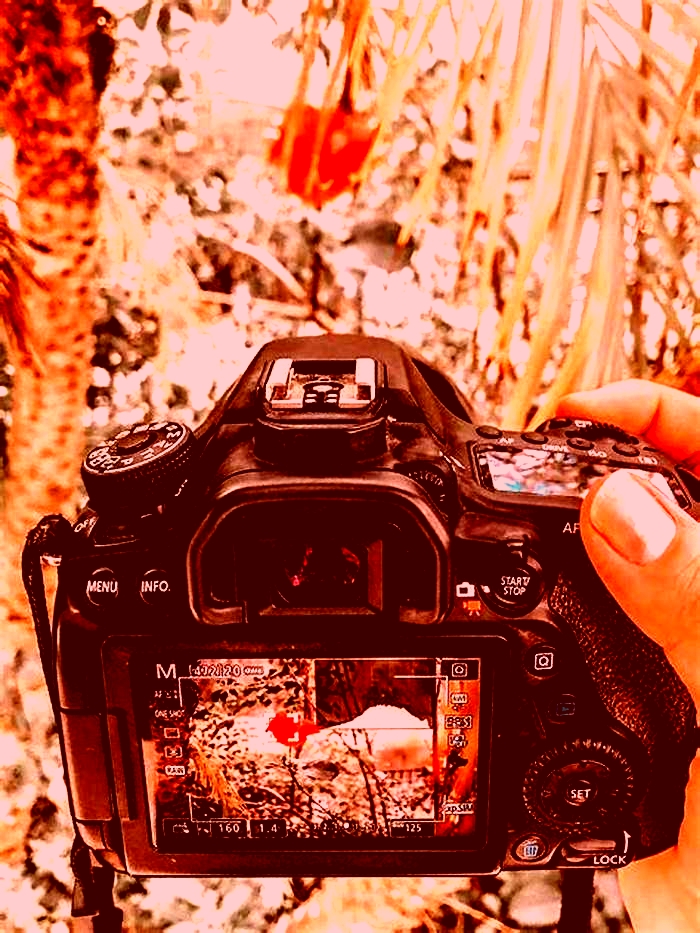
The Ultimate Guide to Learning how to use Your first DSLR
New to Photography? Check out our free Ultimate Guide to Photography for Beginners.
If youve bought yourself a DSLR (or mirrorless camera) and, after unpacking it from the box, you are intimidated by the number of buttons and dials, and by the thickness of the manual, it can be very tempting to put the manual down, flick it onto Auto and start shooting.
Whilst that is fine for some, it may not be long until you crave the creative control that inspired you to purchase a DSLR in the first place, but where do you begin?


If you consider yourself a beginner who is unsure of how to make the most of your camera, this post is designed for you. Its intended to be a brief, a one-stop shop to help you take your camera off auto, and take control of your DSLR. It isnt intended to be a replacement for your camera manual, so will not explain every last setting in great depth, but will cover enough of the basics to get you in control of your camera, and give you the key topics to go back to your manual to read.
Steps for Learning How to Use Your DSLR include:
Heres some steps for learning how to use that new DSLR that well cover in this article.
- Master Shooting modes (including priority modes and full manual)
- Understand ISO
- Learn the exposure triangle
- Master Metering including exposure compensation
- Learn About Focussing
- Understand file size/types
- Learn about White balance
Theres lots to learn if you want to get the most from your DSLR but lets start by digging into each of these topics.
Note to Mirrorless Camera Owners: almost everything in this article is relevant not only to DSLR owners but also mirrorless camera owners too!
1. Master Shooting modes
The best place to start is with shooting modes. The shooting modes will most likely be found on a dial labelled with auto, Av, Tv, P, M and maybe more. Selecting a shooting mode will determine how your camera behaves when you press the shutter, for example, when auto is selected, the camera will determine everything to do with the exposure, including the aperture and shutter speed. The other modes, Av, Tv, P, M, are there to give you control:


Dont worry if your mode dial looks a little different; different manufacturers use different abbreviations for the shooting modes. Your mode dial may have the letters A, S, P, M (instead of Av, Tv, P, M), yet they all function in the same way. Below, I have given each abbreviation for the given mode.
Aperture Priority (Av or A)Aperture priority can be thought of as a semi-automatic shooting mode. When this is selected, you as the photographer set the aperture and the camera will automatically select the shutter speed. So what is aperture and when would you want to control it?
The aperture is the size of the opening in the lens through which light is allowed to pass whenever the shutter is opened the larger the aperture, the more light passes through.
The aperture is measured in f-stops and is usually displayed using an f-number, e.g. f/2.0, f/2.8, f/4.0, f/5.6, f/8.0 etc, which is a ratio of focal length over diameter of the opening. Therefore, a larger aperture (a wider opening) has a smaller f-number (e.g. f/2.0) and smaller aperture (a narrower opening) has a larger f-number (e.g. f/22). Reducing the aperture by one whole f-stop, e.g. f/2.0 to f2/8 or f/5.6 to f/8.0, halves the amount of light entering the camera.


Aperture is one of the most important aspects of photography as it directly influences the depth of field that is, the amount of an image that is in focus. A large depth of field (achieved by using a small aperture (large f-number)) would mean that a large distance within the scene is in focus, such as the foreground to the background of the landscape below.


An aperture of f/13 was used here to give a large depth of field, ensuring that the whole image, from the foreground grasses to the background mountains. was sharp
Whereas a shallow depth of field (achieved by using a large aperture (small f-number)) would produce an image where only the subject is in sharp focus, but the background is soft and out of focus. This is often used when shooting portraiture or wildlife, such as the image below, to isolate the subject from the background:


A large aperture of f/4.5 was used to capture this water vole, against a soft, out of focus background
So when using aperture priority, you can get complete control over your depth of field, whilst the camera takes care of the rest.
Further Reading: Read more about Aperture Priority Mode.
Shutter Priority (Tv or S)Similarly to aperture priority, this is another semi-automatic shooting mode, though in this instance, you as the photographer set the shutter speed and the camera will take care of the aperture. The shutter speed, measured in seconds (or more often fractions of a second), is the amount of time the shutter stays open when taking a photograph. The longer the shutter stays open, the more light passes through to the sensor to be captured.
You would select a short shutter speed if you wanted to freeze a fast moving subject, such as shooting sports, action or wildlife, for example:


A very fast shutter speed of 1/4000th sec was used to freeze the motion of this grouse in flight
You would use a long shutter speed if you wanted to blur a moving subject, for example water rushing over a waterfall (slower shutter speeds will require you to put the camera on a tripod to ensure the camera is held steady whilst the shutter is open):


To capture the motion of the waves, and render the water with a soft, milky texture, a shutter speed of 6 seconds was used here
So whilst you worry about what shutter speed you need for a given photograph, the camera will determine the appropriate aperture required to give the correct exposure.
Aperture and shutter priority shooting modes may be semi-automatic, meaning that some may deride their use because theyre not fully manual, however they are incredibly useful modes to shoot in that can give you enough creative control to capture scenes as you envisage them.
Further Reading: learn more about Shutter Priority Mode.
Program (P)Program mode is almost a halfway house between the semi automatic modes of aperture/shutter priority and full manual control. In program mode, you are able to set either the aperture or shutter speed, and the camera will maintain the correct exposure by adjusting the other one accordingly, i.e. as you change the aperture, the shutter speed will automatically change, and vice versa. This gives you additional freedom that using either aperture priority or shutter priority cannot give without switching between shooting modes.
Manual (M)Manual mode is exactly what it sounds like, you are given full control over the exposure determination, setting both the aperture and shutter speed yourself. There will be an exposure indicator either within the viewfinder or on the screen that will tell you how under/over exposed the image will be, however, you are left to change the shutter speed and aperture yourself to ensure you achieve the correct exposure.
Practically Speaking: as a first step to taking your camera off auto, aperture priority and shutter priority modes offer two very simple ways to start to understand how the different setting impact your images and are a perfect starting place for learning how to use your camera more creatively.
2. Understand ISO
ISO is a measure of how sensitive the sensor of your camera is to light. The term originated in film photography, where film of different sensitivities could be used depending on the shooting conditions, and it is no different in digital photography. The ISO sensitivity is represented numerically from ISO 100 (low sensitivity) up to ISO 6400 (high sensitivity) and beyond, and controls the amount of light required by the sensor to achieve a given exposure
At low sensitivities, more light is required to achieve a given exposure compared to high sensitivities where less light is required to achieve the same exposure. To understand this, lets look at two different situations:
Low ISO numbersIf shooting outside, on a bright sunny day there is a lot of available light that will hit the sensor during an exposure, meaning that the sensor does not need to be very sensitive in order to achieve a correct exposure. Therefore, you could use a low ISO number, such as ISO 100 or 200. This will give you images of the highest quality, with very little grain (or noise).


Taken at ISO 100, the image does not show signs of noise (even when looking at the 100% crop (right)
High ISO numbersIf shooting in low light conditions, such as inside a dark cathedral or museum for example, there is not much light available for your camera sensor. A high ISO number, such as ISO 3200, will increase the sensitivity of the sensor, effectively multiplying the small amount of available light to give you a correctly exposed image. This multiplication effect comes with a side effect of increased noise on the image, which looks like a fine grain, reducing the overall image quality. The noise will be most pronounced in the darker/shadow regions.


This image was taken as the sun was going down, meaning there was not much ambient light. Therefore, this was shot with ISO4000, however you can see very obvious noise in the 100% crop (right)
Practically Speaking: you want to keep the ISO as low as possible, as the lower the ISO, the less noise and the higher the quality of the resulting image. Outside on a sunny day, select ISO200 and see how it goes. If it clouds over, maybe select an ISO between 400-800. If you move indoors, consider an ISO of around 1600 or above (these are approximate starting points).
Most digital SLRs now have an auto-ISO function, where the camera sets the ISO depending upon the amount of light in which you are shooting, keeping it as low as possible. Auto-ISO is a very useful tool when starting out with your camera, as it is allows you to define an upper limit i.e. where the images become too noisy such as ISO1600 or 3200, and then forget about it until situations where you specifically want to override the automatic setting, for example if taking landscape images using a tripod, you can afford to use the lowest ISO possible.
Further Reading: Discover more about how to use ISO.
3. Learn the Exposure Triangle
Its important to note that aperture, shutter speed and ISO are all part of the exposure triangle. They all control either the amount of light entering the camera (aperture, shutter speed) or the amount of light required by the camera (ISO) for a given exposure.
Therefore, they are all linked, and understanding the relationship between them is crucial to being able to take control of your camera. A change in one of the settings will impact the other two. For example, considering a theoretical exposure of ISO400, f/8.0, 1/10th second. If you wanted to reduce the depth of field, and decided to use an aperture of f/4.0, you would be increasing the size of the aperture by two whole f/stops, therefore increasing the amount of light entering the camera by a factor of 4 (i.e. increasing by a factor of 2, twice). Therefore, to balance the exposure, you could do the following:
- Situation 1: Reduce the shutter speed by a factor of 4, i.e. to 1/40th second.
- Situation 2: Reduce the ISO by a factor of 4, i.e. to ISO100
- Situation 3: A combination of the above, shutter speed by a factor of 2 (to 1/20th second) AND reduce the ISO bv a factor of 2 (to ISO200).


Aperture, shutter speed and ISO are all facotrs that influence your exposure, and are all linked. Its just a case of balancing the books!
They all have the net effect of reducing the amount of light by a factor of 4, countering the change in aperture. Its just a case of understanding that they are all linked, and so changing one setting, will cause a change in another.
Using a combination of the semi-automatic shooting modes and auto-ISO would mean you wont necessarily need to think about adjusting your exposure in such a way initially, however understanding the relationship that ISO or aperture has with shutter speed, and knowing the practical implications is a big step in mastering your DSLR .
Further Reading: Read more about the Exposure Triangle.
4. Master Metering
Through out all of the above discussion, I have said that the camera calculates the exposure depending on the amount of available light, but what is it actually doing?
When taking a photograph, using any form of automatic exposure calculation (e.g. aperture priority mode, shutter priority mode, auto-ISO etc) the camera always tries to calculate an average exposure. It will asses the entire scene, both light and dark areas, and determine the exposure so that all of the tones within the entire image average to 18% grey called the middle grey.
This is known as metering, and it is the reason that if you point your camera at a bright white scene, such as after it has snowed, and take a photograph the resulting image will always appear darker than you or I see it. Similarly, if you point your camera at a really dark scene, such as a low-lit room, and take a photograph the resulting image will always be brighter than you or I see it.
The scene is always being averaged by the camera and most of the time that results in the image appearing to be correctly exposed. However, you can control what areas of the scene are being assessed by the camera in order to influence the way in which the exposure is metered.
Generally, there are three metering modes that you can choose from:
Average The camera will assess the tones across the entire image form corner to corner, and expose the scene to 18% grey from that assessment.
Centre-weighted The camera weights the exposure reading for the area in the centre of the viewfinder that can total up to approximately 80% of the scene, ignoring the extreme corners of the image.
Spot metering The camera will use a very small area of the scene, typically a small circle in the centre of the viewfinder that totals approximately 5% of the viewfinder area. It will make the assessment of dark/light tones in this area and expose the entire scene to 18% grey, from that assessment.
Practically speaking: when starting out with your camera, either average or centre weighted metering are a good starting point. They will both provide a fairly consistent measure of the exposure required and, if you select one mode and stick with it, you will soon begin to understand when a scene will be under exposed (i.e. too dark) or over exposed (i.e. to light) compared to how you see it with your own eyes.
But what can you do if a scene is under/over exposed? That is where exposure compensation comes in.
Further Reading: A Beginners Guide to Metering Modes
Exposure Compensation
Generally found on a small +/- button near the shutter, this is one of the most useful functions to learn how to use. It allows you to either increase or decrease the cameras default meter reading to account for the actual brightness of a scene.


If a scene contains primarily bright tones and is being rendered too dark, for example, a bright white snow scene (that will typically be reduced to 18% grey by the default metering system), you can apply positive exposure compensation to let the camera know that the scene should be lighter than middle grey.


A spring lamb leaping in front of a snowy hillside. Left: Straight out of camera, with the snow caught as grey. Right: With +2 stops exposure compensation (added in post processing). The bright snowy background caused my camera to underexpose this scene by nearly two stops, which could have been corrected by exposure compensation in camera.
Conversely, if a scene contains primarily dark tones and is being rendered too light, for example, a dark night scene (that will typically be increased to 18% grey by the default metering system), you can apply negative exposure compensation to let the camera know that the scene should be darker than middle grey.
Further Reading: How to Use Exposure Compensation to Get Better Exposed Photos.
5. Learn About Focussing
Regardless of what shooting mode you are using, or what ISO you define, the chances are there will be a subject of your image that you want to have in focus. If that focus is not achieved, the image will not be what you wanted.
Autofocus modesDSLRs come with a range of autofocus modes, however, for simplicity, the two that are most important to understand are AF-S and AF-C
AF-S autofocus-single. This is best used when taking photos of stationary subjects such as portraits of people, landscapes, buildings etc. When you half-press the shutter, the focus will be acquired and locked on that point for as long as you hold the button down. If you want to change to focus, you need to release the button, recompose and then re-half-press.
AF-C autofocus-continuous. This is best used when taking photos of action or moving subjects such as sports and wildlife. When you half-press the shutter, focus will be acquired and locked on to a given subject. When that subject moves, the focus will adjust with it, refocusing all of the time until the photograph is taken.
(These modes are not to be confused with the AF/MF switches on the lens, where AF stands for autofocus and MF stands for manual focus. That switch is an override for if you want to manually focus your lens. If you want to make use of the autofocus modes discussed above, ensure the lens is set to AF).
Further Reading: Understanding Focus Modes
Focus PointsBoth of those focus modes rely on what are known as focus points. When you look through the viewfinder, you should see a number of squares/dots overlaid across the screen. When you half-press the shutter, you should see one of these squares be highlighted in red. That is the active focus point, and it is that position within the frame that the camera is focussing on. A viewfinder with 9 focus points is shown below:


New DSLRs can come with over 50 focus points and the temptation is to leave it on fully automatic focus point selection, with the thinking that the camera will be able to select the correct focus point. However, only you know what you want to focus on, and there is no better way than ensuring the correct subject is in focus than by using one focus point, and placing that focus point over the subject.
If you select a single focus point, you should be able to change which point is active fairly easily either by using directional buttons one of the dials. If you select a focus point that is on your desired subject, you will ensure that the camera focuses where you want it to. After a small amount of practice, you will soon get into the habit of being able to change the focus point without taking the camera away form your eye.
Practically speaking: Initially, set your camera to use a single focus point (your camera manual should tell you how to do this). This way, you will be able to choose what you are focussing on, ensuring that the subject you want to capture is in focus. Once you are familiar with the basic focussing modes and focus point selection, you can then explore the more advanced modes that your camera may offer.
6. Understand File Size and Types
You will have the option to be able to change the size of the images that your camera records, and in which file type. You want to set the file size to the largest possible (whether it is large or fine or super fine) to ensure that you are making the most of the mega pixels that you have just invested in.
You will also have the option of choosing whether to record the images as raw or jpeg file type. A raw file is uncompressed, and so contains a lot of image data that allows for a lot of flexibility during post-processing (i.e. on your computer) but also comes with additional complications such as the need to process every file using dedicated editing software and a larger file size. A jpeg is a compressed file type, that is automatically processed by the camera. They will be print ready straight out of the camera, and are much smaller files, meaning you can fit more images per memory card.
Practically speaking: When starting out with your camera, using jpeg is the most straight forward. It will enable you to get the best results whilst you learn the basics or your camera before complicating matters with post-processing of raw files.
7. Learn about White balance
If shooting in jpeg, as recommended above, you will need to make sure you set your white balance before taking a picture. The white balance can significantly impact colour tone of your photographs. You may have noticed that sometimes your images have a blueish tone to them or, in others, everything looks very orange. This is to do with the white balance and, whilst you can make some adjustments to the image on your computer, it is much simpler if you get it right up-front.
Different light sources (such as the sun, light bulbs, fluorescent strips etc) emit light of different wavelengths, and therefore colours, which can be described by what is known as colour temperature. Light from a candle, or from the sun during sunrise/sunset, is very warm, and contains a lot of red/orange wavelengths; whereas light from a fluorescent strip is much cooler, containing a lot of blue wavelengths. This coloured light is reflected off of surfaces, but our brain in clever enough to recognise this and automatically counter the effect, meaning that we still see a white surface as a white surface. However, your camera is not that intelligent, and unless told otherwise, will record the orange or blue tones giving the colour cast to your images.


Left: The image captured using auto white balance has a heavy yellow tone from the artificial street lighting. Right: the same image, corrected for a Tungsten white balance, giving the cooler tones on the stone work, and the bluer sky
As the colour temperature of different light sources is well known, there are a number of presets built into your camera that help to overcome the different colours of light in different situations cooling the warm light, and warming the cool light all in the cause of trying to capture the colours of the scene accurately. The auto feature (auto WB or AWB) will attempt to predict the colour of the light by detecting the predominant colour of the scene and then countering it, however it may not necessarily make a correct decision, leaving you with inaccurate colours. Therefore it is best to set the colour balance before you take your image and just to make sure (note:the above image was a raw file giving me a lot of latitude for white balance correction. Jpeg files are not as susceptible to white balance adjustments, meaning the white balance correction needs to be made before the image is taken):
Daylight To be used on clear sunny days. Bright sunlight, on a clear day is as near to neutral light that we generally get
Cloudy To be used when shooting on a cloudy day. Adds warm tones to daylight images.
Shade To be used if shooting in the shade, as shaded areas generally produce cooler, bluer images, so need warming up.
Tungsten Used for shooting indoors, under incandescent light bulbs, or under street lights, to cool down the yellow tones.
Fluorescent Compensates for the green/blue tones of fluorescent light strips when shooting indoors.
Flash the flash will add a cool blue cast to the image, so used to add some warmth.
Practically speaking: avoid auto white balance and set the white balance manually. Generally, you will be able to look up at the sky and see what kind of day it is, and determine the colour balance required pretty easily. If you move indoors, just check the lighting that you are shooting under, and again select the appropriate white balance. It will soon become second nature to set it as you take your camera out of the bag.
Further Reading: Learn more about White Balance
Conclusion
So that is an overview of the settings you will encounter when you want to take the leap and take your camera off Auto. You dont necessarily need to consider them all straight away, but exploring and understanding the effect of each setting will soon have you in complete control of your camera. The biggest step, that will give you the most noticeable difference in the feeling of control and direct influence on creative results, will be to start using the aperture priority or shutter priority shooting modes and once you are familiar with those, you can start thinking about exploring further. Soon enough, you will no longer think of your camera as a mysterious black box, but understand how to achieve the photographic results that you bought it for in the first place.
More Ultimate Photography Guides
If you enjoyed reading this tutorial weve put together a series of other similar articles that you may find useful:


