Preventative Maintenance for Drones Pre Flight Checks and Extended Lifespan Strategies
Drone Maintenance 101: Tips to Keep Your UAV Flying High
Why Drone Maintenance is Crucial
Regular drone maintenance is essential to keep your UAV performing at its best. Proper care and attention can extend the life of your drone and ensure that it remains safe and reliable during flights. Here are some key reasons why drone maintenance should be a top priority for any drone owner:
- Safety: A well-maintained drone is less likely to experience malfunctions or failures during flight, reducing the risk of accidents or injury to people and property.
- Performance: Regular maintenance helps maintain optimal drone performance, ensuring smooth flights and high-quality images or video footage.
- Cost Savings: Preventative maintenance can help identify and resolve issues before they become more severe, potentially saving you from expensive repairs or replacements.
- Compliance: Proper drone maintenance is essential for adhering to local regulations and manufacturer guidelines, ensuring that you remain compliant with any rules or requirements.
Essential Drone Maintenance Tasks
Inspecting Your Drone
Regular inspections are an essential part of drone maintenance, helping to identify potential issues before they become bigger problems. Here are some key components to check during your inspection:
Frame
Visually inspect the drones frame for any signs of damage or wear, such as cracks, loose components, or bent parts. If you spot any issues, repair or replace the affected components as needed.
Motors
Examine the motors for any signs of wear or damage, and ensure they spin freely without any obstructions. Listen for any unusual noises during operation, as this could indicate a problem with the motor bearings.
Propellers
Check the propellers for any cracks, chips, or warping. Damaged propellers can affect flight stability and performance. Replace any damaged propellers and ensure they are securely attached to the drone.
Battery
Inspect the battery for any swelling, leakage, or damage. Make sure the battery terminals are clean and free of corrosion. Always use the manufacturer-recommended battery and charger for your drone to ensure optimal performance and safety.
Camera and Gimbal
If your drone is equipped with a camera and gimbal, check for any signs of damage or wear. Make sure the gimbal is functioning smoothly, and clean the camera lens to ensure clear, high-quality images.
Cleaning Your Drone
Proper cleaning is essential for maintaining the performance and longevity of your drone. Here are some tips for cleaning various drone components:
Frame and Motors
Use a soft brush or compressed air to remove any dirt, dust, or debris from the frame and motors. For more stubborn dirt, use a damp cloth with a mild cleaner, making sure to avoid getting any moisture in the motors or electronic components.
Propellers
Clean the propellers with a damp cloth and mild cleaner, removing any dirt or debris that could affect their performance. Make sure to dry the propellers thoroughly before reattaching them to the drone.
Battery
Wipe the battery terminals with a dry cloth to remove any dust or debris. If necessary, use a cotton swab dipped in rubbing alcohol to clean any corrosion from the terminals.
Camera and Gimbal
Gently clean the camera lens with a lens cleaning solution and a microfiber cloth to remove any smudges or dirt. Use a soft brush or compressed air to clean the gimbal, ensuring it remains free of dust and debris.
Drone Storage
Proper storage is essential for protecting your drone when its not in use. Here are some tips for safe and effective drone storage:
Temperature and Humidity
Store your drone in a cool, dry place, away from direct sunlight or heat sources. High temperatures and humidity can damage your drones electronic components and battery.
Battery Storage
Its best to store your drones battery at around 50% charge, as this can help extend its overalllifespan. Avoid storing the battery fully charged or completely depleted, as this can negatively affect its performance and longevity.
Traveling with Your Drone
When transporting your drone, use a sturdy and protective carrying case designed specifically for your drone model. This will help protect your UAV from impacts, dust, and moisture. Remove the propellers and secure the gimbal (if applicable) to minimize the risk of damage during transit.
By following these essential drone maintenance tasks, you can ensure your UAV remains in top condition, maximizing its performance, safety, and lifespan. Regular inspections, cleaning, and proper storage are all key aspects of drone maintenance that every drone owner should prioritize.
Pre-flight Checklists and Procedures for Drone Operation
Drones have revolutionized various industries, from photography and videography to agriculture and search-and-rescue missions. Their increasing popularity has made it essential for operators to prioritize safety and efficiency. One crucial aspect of safe and successful drone operation is adhering to pre-flight checklists and procedures. In this article, we will delve into the importance of pre-flight checklists and outline a comprehensive guide to ensure your drone operations soar without a hitch.
The Significance of Pre-flight Checklists
A pre-flight checklist serves as a systematic guide to ensure that your drone is in optimal condition before taking to the skies. Whether you're a seasoned drone pilot or a novice, following a checklist is crucial for several reasons:
- Safety First: Safety should always be the top priority. A thorough pre-flight checklist helps identify potential issues or risks, reducing the chances of accidents during flight.
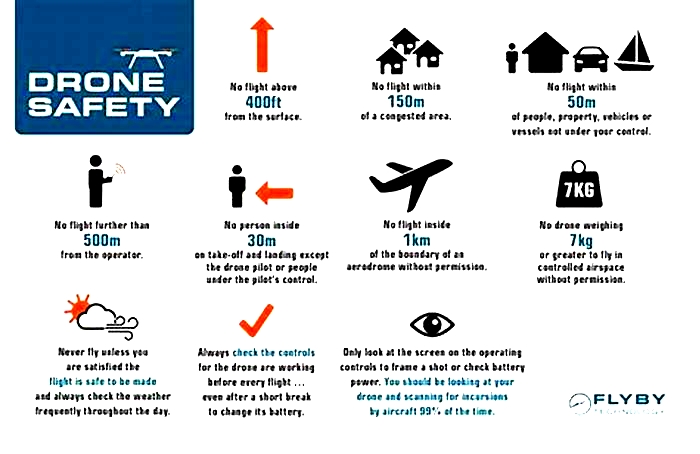
- Compliance with Regulations: Many countries have strict regulations governing drone operations. A pre-flight checklist can help you ensure that your drone complies with these regulations, preventing legal issues.
- Equipment Reliability: Checking your equipment before each flight helps detect any malfunctions or wear and tear, allowing you to address them promptly and prevent mid-flight failures.
- Improved Efficiency: A well-organized pre-flight routine saves time in the long run. By systematically going through the checklist, you can quickly identify and address any issues, making your operations more efficient.
- Confidence Building: Following a checklist instills confidence in both the operator and any stakeholders involved, such as clients or team members, knowing that every precaution has been taken.
Pre-flight Checklist Essentials
Now that we've established the importance of pre-flight checklists, let's dive into the essential components of a comprehensive pre-flight checklist for drone operation.
- Check the Weather: Before launching your drone, check the weather forecast. Avoid flying in adverse conditions like strong winds, rain, or fog, as they can pose significant risks to your drone's stability and safety.
- Inspect the Drone: Carefully inspect the drone's physical condition. Look for any signs of damage, loose parts, or corrosion. Pay special attention to the propellers, landing gear, and sensors.
- Battery Check: Ensure the drone's batteries are fully charged and in good condition. Check for swelling or damage, and verify that the battery connectors are secure.
- Controller and Transmitter: Examine the controller or transmitter for any damage or issues. Ensure it is charged and properly connected to the drone.
- Calibration: Perform necessary calibrations, such as compass calibration, to ensure accurate flight performance.
- Software and Firmware: Verify that the drone's software and firmware are up-to-date. Updates often include important improvements to flight stability and safety features.
- GPS Signal: Wait for a strong GPS signal before taking off. This will help maintain stability and provide accurate location data during flight.
- Emergency Procedures: Familiarize yourself with the drone's emergency procedures, such as how to perform a manual landing in case of system failures.
- Checklist Documentation: Keep a printed or digital copy of your pre-flight checklist for reference. This ensures you don't miss any crucial steps in the heat of the moment.
- Pre-flight Briefing: If you're flying in a team or with clients, conduct a pre-flight briefing to ensure everyone understands their roles and responsibilities.
Post-Flight Procedures
While pre-flight checklists are essential, don't forget about post-flight procedures. These steps are just as critical for the overall health and longevity of your drone:
- Battery Care: After landing, remove the batteries from the drone and controller. Store them properly to prevent damage or over-discharge.
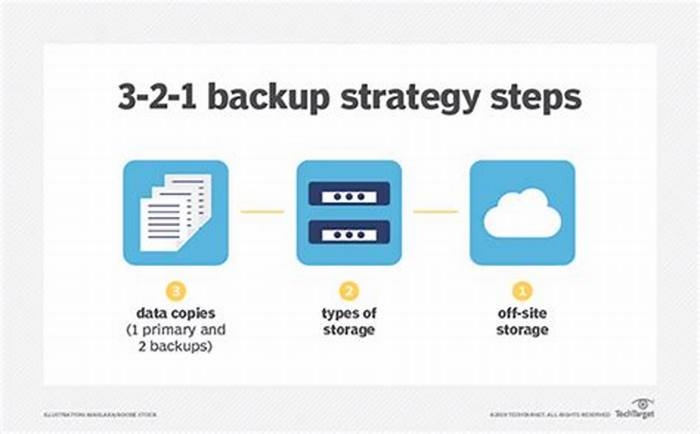
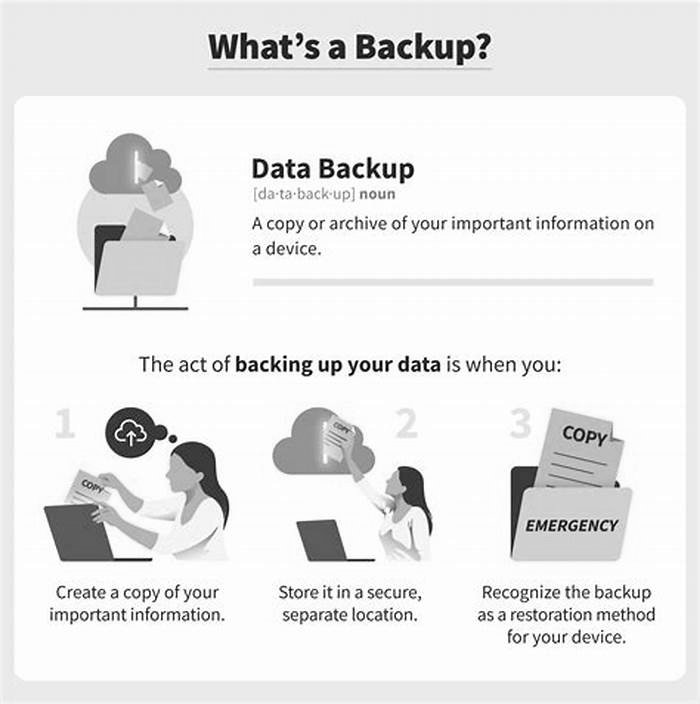
- Data Transfer: Download and back up any data or footage captured during the flight. This ensures you won't lose valuable information in case of a mishap.
- Cleaning and Maintenance: Clean the drone and its components, removing dirt and debris. Check for any damage or wear that might have occurred during the flight.
- Log Entries: Keep a detailed flight log, recording important information such as flight time, location, weather conditions, and any issues encountered during the flight.
The Complete Drone Pre-Flight and Post-Flight Checklist

If you have been around the drone community for any length of time, you have probably heard drone enthusiasts recommend following a pre-flight checklist. While it might seem unnecessary to have a pre-flight checklist for a drone, the fact remains that these small aerial systems operate in the overlying airspace. A pre-flight checklist is a foolproof way to ensure that each and every flight is conducted safely.
In most cases, following a few safety-related steps can mean the difference between an unnecessary accident and a safe flight. We created a one-size-fits-all pre-flight procedure that is a great starting place for all drone operations.
In addition, we have provided a detailed commentary of any steps warranting further explanation.
Content
>>Checklist Items to be Completed at Home
>>Checklist Items to be Completed on Site
>>The Complete Drone Post-Flight Checklist
The Complete Drone Pre-Flight Checklist
The complete drone pre-flight checklist is divided into two sections steps to be completed at home and those to be completed on-site.
Checklist Items to be Completed at Home
Check the weather forecast for the area
Before you set out, be sure to check the weather forecast for the area in which you will be flying. In particular, look at the forecast winds, temperature, and precipitation, and cross-check this information with the operational limitations published by the manufacturer. If the weather is suitable for flight, proceed with the checklist. If not, find another place to fly.
Note: Think about the potential effects of things like the wind; if you plan on flying a far distance, think about how wind direction and velocity might help or hinder the drones performance.
Check the airspace for the area and get authorization (if needed)
Use a resource like Airmap to check the classification of the airspace in which you plan to fly. If needed, ensure that you obtain authorization to fly in controlled airspace. Although drones are small, they still operate in federally-regulated airspace. Automated authorization is available at select locations through apps like Airmap and Kittyhawk.
Check NOTAMs (Notices to Airmen)
Check NOTAMs for the area in which you plan on flying to gain situational awareness and avoid potential hazards. NOTAMs often include information about low-altitude obstructions that might be a factor in drone operation.
Survey the site using Google Maps or Google Earth
If you plan on flying at an unfamiliar location, conduct a preliminary survey of the area with Google Maps and/or Google Earth. This will highlight any obstacles in the area.
Check that the drones mobile app is up to date

Check that the drones firmware is up to date
Drone firmware updates are released periodically. These updates improve the safety and reliability of a drones operation. Thus, it is important to ensure that there are no available firmware updates before setting out to fly.
Check that all hardware is charged

Before setting out, it is critical to ensure that all hardware necessary for the flight is fully charged. The typical hardware necessary for drone operation includes a mobile device, remote controller, and drone batteries.
Check that the SD card is formatted and inserted into the drone

The last thing you want is to arrive on-site and realize that you forgot your SD card at home. Prior to setting out, double-check that the memory card is clear and inserted into the drone.
Checklist Items to be Completed on Site
Survey the area for obstacles
Upon arrival, visually inspect the area for obstacles that might not have been visible on the preliminary survey, such as powerlines. This will give you a better understanding of the surrounding area, helping you avoid a preventable mishap.
Establish a safe takeoff/landing area
Find an area suitable for takeoff and landing. This location should be flat and free of obstacles. In addition, be sure to choose an area free of overhead obstacles like trees or powerlines.

Note: Avoid areas with sand, gravel, grass, or other small debris; debris from these surfaces could harm the drones components if stirred up from the prop downwash on startup and takeoff.
Unfold the drones arms (if applicable)
Inspect the drone for damaged components
Thoroughly inspect the drone for any signs of damage. In particular, check the props and motors for any damage that might render the operation of the drone unsafe.
Check that the props are securely attached and unfolded
Ensure that the props are securely attached to the motors. For safety reasons, this step is critical. Then, unfold the blades. This will minimize stress on the motors and the surrounding components when the motors are started.
Remove the gimbal cover

Forgetting to remove the gimbal cover is a common mistake that virtually every drone operator will make at some point. This step is important because failing to remove the gimbal cover could result in damage to the gimbal motor as it attempts to move the gimbal around during startup.
Secure any additional accessories and/or payload
Attach any additional accessories (such as ND filters). If your drone will be carrying any type of payload (i.e. a different camera), attach it.
Insert the battery
Make sure that the battery is properly inserted into the body of the drone. To ensure that the battery is seated securely, slightly pull on it. If there is no play, proceed with the checklist.
Place the drone on the ground in the designated takeoff area
Turn on all devices and connect components
Power on the drone and remote controller, connect the mobile device to the remote controller and launch the drones particular mobile app.
Check the IMU and calibrate if needed
Check that the IMU is normal. If it is abnormal, there will typically be a caution prompting you to calibrate it. If the IMU is abnormal, follow the proper calibration procedure. Having a properly-functioning IMU is critical, as it helps control and measures the drones altitude and velocity.
Check the compass and calibrate if needed
Check that the compass is normal. If it is abnormal, follow the proper calibration procedure. The compass is a critical component, as it helps the drone determine its heading. Should the return-to-home function be activated, the compass is the primary component that guides the drone back to the correct location.
Check the GPS signal strength (if applicable)
Check to see if the drone has adequate satellite coverage. For GPS drones, this step is critical, as it ensures that the drone will hold its position during flight. It is recommended to wait until the drone has acquired the maximum number of satellites before proceeding.
Set return-to-home altitude

Set the desired return-to-home altitude, ensuring that the specified altitude is higher than any obstacles in the area (like trees or buildings).
Set the home point
Set the home point, and make sure that it is accurate. Should the return-to-home feature be activated, this will ensure that the drone has the correct reference point so that it can make it back to the proper location.
Check all relevant camera settings
Ensure that the proper camera settings are selected.
Perform a hover check
Start to motors, and bring the drone to a stationary hover slightly above head level. For 20-30 seconds, monitor the drone itself along with the on-screen feed for any abnormal indications. If the drone holds its position, proceed with the checklist.
Note: it is normal for the drone to waver slightly and make subtle attitude adjustments in windy conditions. This indicates that the GPS is functioning properly, as the drone is compensating for the environmental conditions.
Conduct the flight
During the flight, continuously monitor the on-screen indications, and maintain overall situational awareness.
Land the drone
The Complete Drone Post-Flight Checklist
A thorough post-flight checklist is also important, as it will reveal any damage the drone sustained during the flight.
Turn off all devices
Power off the drone and remote controller, and close the mobile app.
Inspect the drone for damage
Again, inspect the drone for any signs of damage. In particular, inspect the props for cracks, chips, or warping, and inspect the motors and arms for damage.
Remove the battery
Some drone operators prefer to leave a battery in the drone while not in use, but this is not recommended. Should the battery be turned on inadvertently, the gimbal motor might be strained. This situation could also be a fire hazard.
Let the motors cool
Check to see if the drones motors are still warm. If so, allow them to cool off before proceeding with the checklist.
Secure the gimbal cover
Be sure to securely reattach the gimbal cover. This will prevent the gimbal from being damaged while the drone is transported.
Fold the legs (if applicable) and stow the drone

Fold the props (or remove them completely), fold the legs, and stow your equipment.
Transfer data (if applicable)
When able, transfer any data from the SD card onto a hard drive.
In Closing
And there you have it the complete drone pre-flight and post-flight checklist. Follow these steps each and every time you fly to promote safety and keep your drone in good working order.


