How to Clean and Maintain Your Gaming Console
How to Store and Maintain Your Game Systems
What to Know
- Location: Avoid enclosed spaces. Open stands/wire racks allow heat to flow and can be easily cleaned.
- Maintenance: Check/clean vents periodically (every six months). Use handheld vacuum, not compressed air.
- Tips: Don't store game cases on system, stow controller cables, dust regularly, let air circulate.
This article explains how to better store and maintain your video game consoles to better protect them over time.
Location Is Everything
Just about the worst thing you can do is stuff your high-powered game system into the back of an enclosed entertainment center or TV stand. There is nowhere for the heat to go, and there is usually a lot of dust back in these dark corners that can significantly shorten the life of your system. So where are we supposed to put a game system? There are quite a few solutions from which to choose,so the goal is to find one that not only performs well but looks nice also.
The best choice is a TV stand with an open back and/or open sides. This makes it easier to clean as well as lets the heat move away from your game system. If you arent concerned about looks, like if your system is set up in a game room or bedroom, you could also try a simple wireframe A/V rack as that would definitely allow for maximum airflow. It's also possible to buy a gaming-centric storage rack.
System Maintenance
Even after you have the location picked out, you still have to dust and make sure things are clean every once in a while. It is also recommended that you take a look at the vents on your game system and clean them as well if need be. Dont use compressed air to blow the dust-out, because that will just blow it into the system and likely cause a new problem. Instead, you can use a small handheld vacuum to pull the dirt out. Doing this every six months or so can save you a lot of heartache later.
Additional Advice
- Dont store game cases or other stuff on top of your game systems. It can reflect the heat back into the system and cause the system to not function properly.
- Dont leave wired controllers strung out all over your living room. The last thing you want is for the family dog, or young kids, or your dumb friends tripping over them and yanking your game system onto the floor. The Xbox and Xbox 360 have breakaway controller cables so this hopefully wont happen, but preventing it from happening in the first place is the only protection you can count on.
- Keep your systems clean. Dust is the mortal enemy of electronics. Fight it any way you can.
- Keep your systems cool. Use TV stands and/or entertainment centers with open backs. This lets the air circulate so your system doesnt get too hot.
- Dont panic if something goes wrong. Your Xbox 360 gives you error messages and ring of light errors for a lot of reasons. Check your power cables, check the AV cables, make sure it is properly ventilated, make sure there isnt anything on top of it. If these are all fine, then you can panic.
- Dont throw away the box the system came in. They are a handy way to transport the system if you need to since you can keep everything organized and in one spot.
Thanks for letting us know!
Get the Latest Tech News Delivered Every Day
SubscribeTell us why!
How to Maintain Your Vintage Video Game Consoles for Longevity
Introduction
Vintage home video game consoles from the 1970s to 1990s are treasured by collectors for their iconic games, nostalgic value and historical significance. Keeping these aging devices working properly requires some preventative maintenance and care.
This guide will provide tips on how to clean, restore, modify and store vintage consoles like the Atari 2600, NES, Super Nintendo, Sega Genesis, PlayStation and more to extend their lifespan. With some simple servicing, you can keep your retro games working for many more years of 8-bit and 16-bit fun.
Key Takeaways:
- Open up consoles carefully for internal cleaning and repairs
- Replace belts, capacitors, switches and connectors as needed
- Clean games and check pins for corrosion and damage
- Consider adding video and audio mods for clean output
- Maintain proper temperature, humidity and storage
- Handle gently to avoid damage to plastic and circuits
- Keep dust and insects away from exposed electronics
- Test consoles and games to verify proper functioning
Disassembling Consoles Safely
When opening up vintage consoles for internal servicing, take care not to damage the original parts:
- Use proper screwdriver size to avoid stripping screws
- Label screws and note source as you remove
- Snap reference photos before removing components
- Clean with isopropyl alcohol and cotton swabs
- Discharge large capacitors before handling
- Look for leaking, bulging or popped capacitors
- Check for burnt, cracked or broken traces
- Test button membranes for torn traces before removal
Take your time and be very careful around fragile plastic clips and thin ribbon cables.
Cleaning Contacts and Connectors
One of the best ways to maintain systems is by cleaning the edge connectors and power ports:
Cartridge Ports
- Use isopropyl alcohol and cotton swabs to scrub pins
- Blow out dust with compressed air
- Straighten bent pins carefully with tweezers
- Check slot for broken plastic and debris inside
Power and Video Connectors
- Remove oxidation and corrosion from pins
- Soak seriously corroded ports in white vinegar
- Use contact cleaner spray on ports and jacks
Control Ports
- Clean controller ports with alcohol and swabs
- Soak severely corroded ports in white vinegar
- Test button contacts with continuity setting on multimeter
Expansion Ports
- Scrub the pins on ports for add-ons like Genisis 32X
- Ensure a tight connection by gently bending pins
Regular cleaning prevents game issues and connectivity problems!
Replacing Belts and Gears
Rubber belts and plastic gears wear out over time and need replacement:
- Order kits with full set of common belt sizes for the console
- Check belt tensions against tutorial videos as you replace
- Adjust belt positions carefully to ensure proper gear rotation
- Grease gears, cogs, and mechanical parts with white lithium grease
- Replace stripped or cracked gears if needed
- Diagnose issues by observing gear movements while powered
Loose, worn or broken belts can cause playback issues for tape-based games.
Recapping Consoles and Controllers
Vintage capacitors often bulge or leak over time:
- Order a matching capacitor kit for the console
- Carefully desolder and remove old caps
- Replace each cap one by one matching polarity and voltage
- Avoid damaging thin traces and pads while soldering
- Test continuity between pins after installation
- Check console and controller boards for damage
Even non-bulging caps can degrade and benefit from replacement after 20+ years.
Cleaning Games and Cartridges
Keeping games and carts clean ensures reliable performance:
- Use 90%+ isopropyl alcohol with cotton swabs
- Gently clean edge pins and ensure they are straight
- Soak badly corroded games in white vinegar then scrub
- Use compressed air to blow out dust from cart slots
- Carefully open carts to clean contacts avoid damaging labels
- For disc based games, use proper CD/DVD cleaners only
Inspect games before playing to spot damage, corrosion or large dust deposits.
Common Audio and Video Mods
Modifying the original inputs and outputs can greatly improve display and sound:
Audio Mods
- Replace capacitors on audio circuit boards
- Install superior isolation transformers and caps
- Add stereo audio output instead of mono
- Bypass low quality RF modulator with direct RCA cables
Video Mods
- Upgrade composite video with S-Video or RGB video output
- Replace capacitors and run traces to output jacks
- Install high quality shielded cables to TV
- Sync to HDMI with upscalers like Retrotink for lag-free display
Storing and Displaying Consoles
Use proper storage methods to avoid temperature and humidity damage:
- Keep consoles in climate controlled room around 65-75F
- Avoid attics, garages and basements with extreme temps
- Use gel packs and desiccants to control humidity
- Store vertically to prevent stacking stress
- Open plastic bags and run devices yearly to check functions
- Display consoles out of direct sunlight to prevent fading
- Keep areas dusted and use glass cabinets for pristine systems
Improper storage accounts for a large portion of vintage electronic degradation.
Handling Precautions
Vintage consoles and games require gentle care in handling:
- Avoid touching circuit boards unless necessary for repair
- Never pull on cables grip connectors by the plastic housing
- Keep food and drinks far away from electronics
- Hold carts by the edges to avoid smudging labels
- If a game doesnt load, gently reseat it instead of forcing
- Let devices warm up to room temperature before powering on
- Transport in protective cases and original packaging if possible
Careful handling prevents costly damage and preserves value.
Maintaining Disk and Tape Drives
Moving-part disk and tape drives need servicing to stay operational:
Floppy Drives
- Use isopropyl alcohol to clean read heads
- Carefully lubricate rails and gears with white lithium grease
- Replace worn drive belts with accurate sizes
CD Drives
- Clean lenses with a CD laser lens cleaner kit
- Apply friction toCD hub with rubber band to increase grip
Cassette and VCR Parts
- Demagnetize tape heads to improve tape playback
- Replace pin belts, gears, and rubber components
These preventative steps greatly improve load success and playback performance.
Testing After Maintenance
After any repairs, thoroughly test the console:
- Power on for 30-60 minutes to check for shorts, overheating
- Try inserting and removing game carts multiple times
- Load games from each genre to test various chips
- For disc systems, check both audio CDs and games
- Check controller inputs by entering button combinations
- Compare video and audio to properly maintained model
Dont assume repairs succeeded always verify.
Seeking Repair Help
For complex repairs beyond your skill level:
- Search for console repair shops in your area or mail-in shops
- Join collector forums and ask trusted members for referrals
- Read shop reviews and ask about warranty coverage
- Get repair cost estimates and timeframe before committing
- Ensure they have experience fixing your particular console
- Backup save data before sending in for repair
Vintage expertise is hard to find thoroughly vet any repair shops.
Conclusion
With careful maintenance like cleaning, repairs, mods and proper storage, vintage game consoles can keep functioning for many more decades. While the plastic and electronics slowly degrade, with your help the gameplay doesnt have to. Keep your old systems in circulation for the next generation of retro gamers to experience.
Frequently Asked Questions
How can you tell if an old game console needs maintenance?
Signs include games not loading, glitchy graphics or sound, controller issues, power problems, dirty/corroded ports, damaged cables, odd smells, overheating and noticeable internal dust. Schedule periodic maintenance to help prevent failures.
What cleaning supplies should you use on vintage game consoles?
Isopropyl alcohol, cotton swabs and compressed air work well for cleaning edge connectors and internal boards. Avoid getting moisture in sensitive areas. For stubborn corrosion, white vinegar or Brasso metal polish help scrub away tarnish.
How do you discharge capacitors in old electronics?
Use a screwdriver with an insulated handle to gently touch both pins and discharge remaining electricity before handling. Repeat contact until meter shows 0 voltage. Some capacitors hold a dangerous charge even unplugged.
Why wont my game cartridge load even after cleaning?
If cleaning fails, the internal slot contacts or cartridge board likely needs refurbishing. The console may need a new 72-pin connector installed. Try gently bending the game pins outward very slightly to improve connections. Reflowing solder joints on the cartridge may help.
Is it worth getting vintage game consoles professionally repaired?
It depends on the repair cost versus the console value. Common 8-bit systems are often affordable to repair. But for rare consoles or complex fixes, seek quotes first. If the console has sentimental value, restoration may be priceless to you. Weigh the costs before proceeding.
Related
How to Clean Your Video Game Consoles
Your video game console is filthy. Choked with dust, smeared with fingerprints or riddled with insects. Your game controllers are a horror show, the seams in the plastic filled with unidentifiable gunk. Lets clean them.
Fallouts Michael Esper On Being 'Obsessed With The Series, Luigi, And More
The biggest threat to your video game consoles and accessories isnt a flung controller. Todays hardware is generally built sturdy enough to withstand a little gamer range. No, the most sinister hazard your expensive electronics face is dirt. The crumbs of your food. The dust in the air. The unidentifiable crud on the hands of small children. The fur of your pets. In extreme cases, the skittering feet of hideous insects.
All of these things are okay in small amounts (maybe not the bugs), but over time accumulated gunk and dust can affect the performance of your game consoles and accessories. Buttons get gunked up. Console fans get choked with dust, causing systems to overheat. Cable connections become unreliable .
Its okay. You can clean all that stuff.
Regular Light Cleaning, AKA An Ounce Of Prevention
The easiest way to clean your game consoles and controllers? Dont let them get too dirty in the first place. Here are a few quick and easy bits of maintenance that, if performed regularly, should keep you from ever having to scroll down to the next section of this guide.
Give It A Good Dusting
Unless youre gaming in a hermetically sealed clean room, dust happens. Soft and fluffy bits of dead skin and hair, pollen, textile and paper fibers are all around us, along with tiny arachnids called dust mites that youre better off not Googling. Seriously, do not Google them. Weve all seen pictures of game consoles and computers choked with thick layers of dust. Its gross. Dont let that happen. Just get yourself a duster, and use it on a weekly basis. Nothing fancyjust make sure whatever duster or cloth you get is made to trap dust and not just fling it into the air. Hit up your local grocery store or supercenter and grab yourself a Swiffer. Give your consoles a quick pass once a week, and you should be good.
Cover That Console Up
When your game console is not in use, power it off and cover it up. There are tailored dust covers available for all of the major consoles for relatively cheap. If you dont want to spend the extra cash and dont mind looking like the king or queen of the terrycloth people, just drape a clean towel over your electronics.
Just bear in mind that most consoles these days come with some sort of sleep mode that only draws a trickle of power so players can get back into the action quickly. If youre going to use a cover, disable that feature first. If you accidentally wake your console without realizing it with a dust cover in place, things can get really heated.
Make It Shine
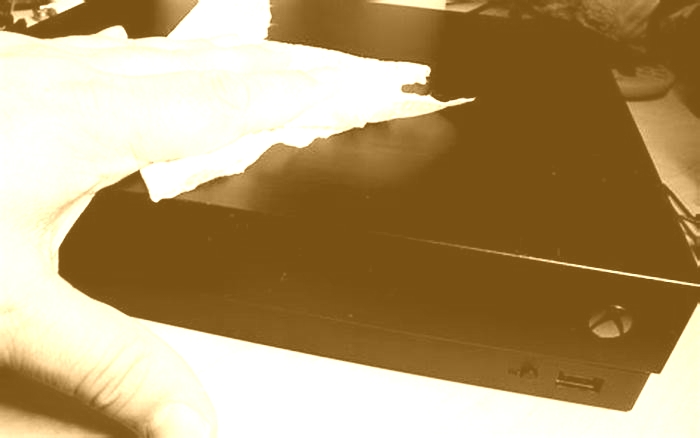
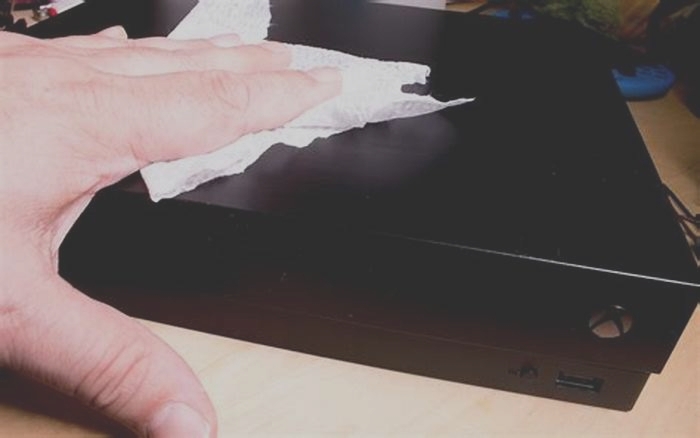
If you tend to keep your hands off of your consoles, a light dusting is all youll need. But if you cant stop touching its shiny surface, a little cleaning spray wouldnt hurt, as long as you do it right. Spray a little of your favorite bleach-free, plastic-friendly cleaning solution on a dry, lint-free cloth. Not too muchyou dont want the cloth dripping, just damp. Then unplug your console (just in case) and give it a nice little wipe down.
Minimum liquid use is key here. Electronics and most liquids do not work well together. Never spray cleaning solution directly at your console. Or, while I am warning against things that should be obvious, in your eyes.
Wipe Down Those Controllers
Even the cleanest of hands can leave oily residue on a video game controller. Were oily creatures. Deal with it. And by deal with it, I mean wipe it away. Once a week, maybe after youve put away your duster, break out a pack of anti-bacterial wipes and give your controllers a good going over. Mind the buttons and cable/charging ports. If youre worried those might get dirty, theyre better served with a cotton swab and some Isopropyl Alcohol (50 percent or higher). And if you use wired controllers, do not forget to go over the cables.
Dirt loves to hide on cables. Know where else dirt loves to hide? In the seams of your controllers. Normally a Q-tip and some alcohol applied on a regular basis will keep the dirt from building up. If it does, it can be dislodged with the tip of a toothpick or a piece of wire, revealing one of the most disgusting substances known to humankind. What is that?
Keep Your Game Media Clean
If what you put inside of your game console is dirty, the inside of your game console will get dirty. Even if your game discs never spend more than a few seconds outside of their case or your console, whatever you might have on your fingers can get on that shiny DVD bottom and cause problems.
Fortunately, CDs, DVDs and Blu-Rays are easy to clean. Take a soft, lint-free cloth and wipe from the center of the disc outward. If the disc is particularly gross, dampen the towel a little bit, but have a dry one on hand for follow-up and give it a little time to completely dry before sticking it in your game system.
Should your console take cartridges, wipe the contacts (the metal bits that go into the console) with a cotton swab and some more of that delicious (its not delicious, do not drink it) Isopropyl Alcohol. This can also be used to clean the contacts inside the console itself, but make sure its completely powered off and unplugged.
Dont Have Children
Yes, I realize place in dont have children under the preventative maintenance section of a console cleaning article is a bit shady. That said, I still havent figured out what the substance sandwiched between the three DVDs my children stuck in my Xbox One all at once is, so there is wisdom there.
Okay, We Did Not Do Any Of That. What Now?
Without regular routine cleaning, theres a good chance your video game console and controllers will get all sorts of icky. When the seams in your pristine white Xbox One controller turn black with dirt. When your PlayStation 4s vents get choked with dust. When the goo and gunk become too much to take, you might need to open your electronics up. But my warranty! Yes, well you should have thought of the warranty before you let your console birth dust babies or get colonized by cockroaches.
As long as you have the right tools, most game consoles and peripherals are pretty easy to open up. The first thing I do when I need to get inside one of my game consoles is stare intently at the visible screws. If there are no visible screws, I spend a little time wondering where the screws are hidden. Then I go to iFixit.com, where they have breakdowns and tutorials for just about everything. I used their Nintendo Switch teardown to help me swap that consoles standard case for something red and translucent.
Once you can take a console apart, you enter a whole new world of cleaning possibilities.
Deep Dusting
Shooting compressed air into a closed video game console is an excellent way to redistribute dust inside that console. Some dust might come out the other side, sure, but a great deal of it is going to get stuck between bits it wasnt stuck between previously. Thats nice for the dust, new scenery and all, but not so great for the console were trying to clean. The answer isnt suck, dont blow either. Blindly applying a vacuum hose to the inside of a game console is a great way to dislodge delicate components (if not break them completely).
The best way to get stubborn dust out of a console is to open it. Take off the cover at the very least, and use your preferred blowing method to dislodge the fluffy stuff. My wife gave me a DataVac blower for my birthday last year, and it is one of my favorite things.
A couple of important blowing notes. First, if your console has a fan, hold it still with a finger when applying air. As much fun as the whirring sound it makes when your compressed air spins it may be, its not good for the fan.
Second, do this outside. Dust needs to go somewhere, and we dont want that somewhere to be in a fine layer over everything in your gaming room. Blow your dust to the four winds. Is it environmentally safe? Sure, bugs eat dust. Probably. Who knows?
Break It Down, Wash It Up
Nothing gets a piece of plastic clean like good old warm water and soap. Its just not a good idea to apply it when that plastic is surrounding hundreds of dollars worth of electronics. But thats what screwdrivers are for. Once you remove anything metallic or circuit board related from a console case, that case is ready for a warm bath in some dish detergent. Just fill the sink or tub, squeeze in some Dove or whatever you have on hand, and scrub with a soft sponge.
The guidelines here are pretty simple. Be gentle, especially with older consoles the plastic of which may not be as flexible as it once was. Dont go too hot. As you dont want the plastic to warpits made to withstand high temperatures, but lets not tempt fate. And, most importantly, make sure everything is dry before you put it back together. Go over the pieces with a towel, shake them to dislodge any hidden liquid, and then let it sit for a few hours, just in case.
Soap and water arent just for console cases. Theyre also great for game controller casings, helping to remove built-up gunk that can cause buttons to stick.
Heres the Xbox One controller I used to let my six-year-old use before I discovered the horrible things hed done to it. The buttons stick. The seams are all crudded up. Theres some sort of film over the rubberized grips.
I toothpicked the gunk, then took the controller apart, washing the buttons and casing in warm soap and water. Once clean and completely dry, I reassembled it, and now its as good as it can get to new .
The Electronic Bits
If your console is working properly, leave the circuit boards inside of it alone. If your console is not working properly and you do not know how to fix it, take it to a repair shop. There are very few reasons that, in the course of cleaning, one should fuss with circuit boards.
If you really must clean that printed circuit board, pour a little alcohol in a bowl, dip a soft-bristled brush or cotton swab into it, and gently apply. Dont scrub, just gently sweep, as if painting a picture of a circuit board not being damaged by what youre doing.
But really, I wouldnt. Once the dust has cleared, you should be okay. Besides, if youre getting the bits inside your game console so dirty you want to wash them, maybe a game console isnt for you.
In Case Of Roaches
Roaches love the insides of electronics. Theyre warm, theyre secure and sometimes when they poop inside there it burns onto circuits, which seems like it would be exciting for roaches. If you suspect your game console is infested with roaches, this simple two-step cleaning process will solve all of your problems.
- Throw the console in the garbage.
- Set the garbage on fire.
If you really want to take care of a roach-infested game console, youll first have to take care of the infestation in your home. Thats a different guide.
Clean Video Game Hardware Is Happy Video Game Hardware
Video game systems and are at their very best fresh from the factory, untouched by dust, grime, food bits, children or bugs. The key to electronics living a long and happy life is keeping them as close to factory clean as possible. All it takes is a little maintenance or, failing that, the will to open your console and make everything right again.
That, or just never remove them from their package. Ever.

