Capturing Cinematic Video Camera Settings and Techniques for Professional Results
Create and Edit Cinematic Videos: A Step-by-Step Guide for Beginners
Contents
Are you interested in learning how to shoot and edit cinematic videos? You've come to the right place! This step-by-step guide is designed to help beginners create stunning videos with ease. We'll walk you through the entire process, from planning your video to sharing it with the world. So, let's get started!
1. Planning Your Video
Before you can create a cinematic masterpiece, it's important to plan out your video. This will help ensure that your final product is cohesive and engaging. Here are three key steps to get you started:
Choose a Theme
First things first: you'll need to choose a theme for your video. This can be anything that interests you, such as a hobby, an event, or a story you'd like to tell. Your theme will guide the rest of your planning process, so take some time to think about what you'd like your video to be about. Remember, the goal is to create a cinematic video, so choose a theme that allows for visually appealing shots and a compelling narrative.
Write a Script
Once you've chosen a theme, it's time to write a script. This is a crucial step, as it will help you organize your thoughts and ensure that your video flows smoothly. Start by outlining the main points you'd like to cover, and then flesh them out with dialogue, descriptions, and any other necessary details. Don't forget to consider the pacing of your videokeep things moving along at a steady clip to maintain viewer interest.
Create a Storyboard
With your script in hand, it's time to create a storyboard. This is a visual representation of your video, showing the sequence of shots and how they'll be framed. You can draw your storyboard by hand or use digital tools like storyboard software or even PowerPoint. By creating a storyboard, you'll be able to plan out your shots, anticipate any challenges, and make sure your video flows well visually. Plus, having a clear plan will make the shooting process much smoother!
Now that you've planned out your video, you're ready to move on to the next phase: learning how to shoot cinematic videos.
2. How to Shoot Cinematic Videos
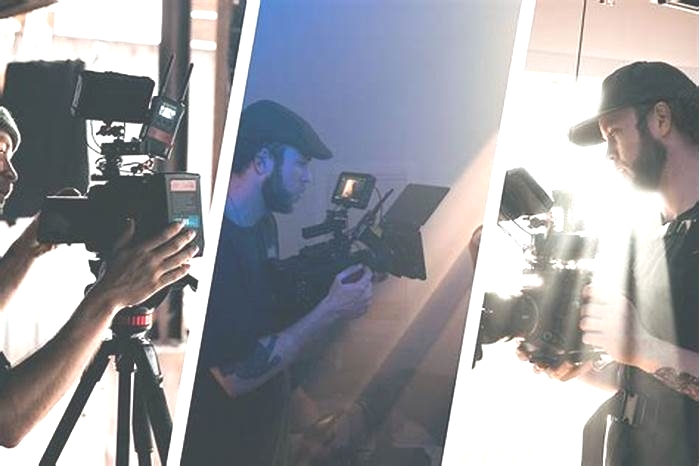
Great job planning your video! Now, let's dive into the exciting world of shooting. Mastering the art of capturing cinematic footage requires some knowledge about equipment, camera settings, and composition techniques. Don't worry, thoughwe've got you covered. In this section, we'll explore these three key aspects of shooting cinematic videos.
Selecting Equipment
First and foremost, you'll need the right gear to capture high-quality footage. Here are some basic equipment recommendations:
- Camera: Choose a camera with manual controls, allowing you to adjust settings for optimal results. DSLRs and mirrorless cameras are popular choices, but don't feel limitedexplore options that fit your budget and needs.
- Lenses: Invest in a variety of lenses with different focal lengths to achieve a range of shots. A prime lens with a wide aperture, like a 50mm f/1.8, is a great starting point for achieving that cinematic shallow depth of field.
- Tripod or stabilizer: To keep your footage steady and smooth, invest in a good-quality tripod or stabilizer. A gimbal is a popular choice for handheld shots.
Remember, it's not about having the most expensive gearit's about knowing how to use what you have to create stunning visuals.
Camera Settings
Now that you have your equipment, let's talk about camera settings. Here are some tips to help you achieve that cinematic look:
- Frame rate: Most films are shot at 24 frames per second (fps), giving them a distinct, smooth motion. Set your camera to 24 fps to emulate this effect.
- Shutter speed: To maintain proper motion blur, follow the 180-degree shutter rule: set your shutter speed to double your frame rate. For example, if you're shooting at 24 fps, your shutter speed should be 1/48 or 1/50.
- Aperture: Use a wide aperture (low f-stop number) to create a shallow depth of field, separating your subject from the background and making your footage look more cinematic.
Experiment with these settings to find the perfect balance and create the look you're aiming for.
Composition Techniques
Lastly, let's discuss compositionthe arrangement of visual elements in your frame. Good composition can elevate your footage from ordinary to cinematic. Here are some techniques to keep in mind:
- Rule of thirds: Imagine your frame divided into nine equal sections by two horizontal and two vertical lines. Place your subject or important elements along these lines or at their intersections for a more visually appealing composition.
- Leading lines: Use lines in your environment (e.g., roads, fences, or buildings) to guide the viewer's eye towards your subject or a specific point in the frame.
- Depth: Create a sense of depth in your shots by including foreground, middle ground, and background elements. This will make your footage feel more immersive and dynamic.
Practice these techniques and be mindful of your composition while shootingit'll make a world of difference in the final result.
With your newfound shooting skills, you're well on your way to creating impressive cinematic videos. But there's more to the process: lighting, audio, and editing. Let's keep going and explore these essential elements next!
3. Lighting and Audio
Congratulations on mastering the art of shooting cinematic videos! However, to truly make your video stand out, you need to pay attention to lighting and audio as well. In this section, we'll cover some practical tips on how to capture great lighting and audio to enhance the overall quality of your video project.
Lighting Tips
Lighting sets the mood of your video and can make a significant difference in how professional your footage looks. Here are a few key tips to get started:
- Natural light: Whenever possible, utilize natural light by shooting near windows or outdoors. Be mindful of the time of daymorning and late afternoon offer the best lighting conditions, known as the "golden hour."
- Three-point lighting: For indoor shoots, consider using a classic three-point lighting setup: a key light as the main source, a fill light to soften shadows, and a back light to create depth and separation between your subject and the background.
- Diffusion: Soften harsh light sources by using diffusion materials like softboxes or bounce boards. This will create a more flattering look for your subjects and prevent overexposed areas in your footage.
Don't be afraid to experiment with different lighting setups to achieve the desired atmosphere for your video.
Audio Recording
Clear, crisp audio is just as important as stunning visuals when it comes to creating a cinematic video. To ensure your audio quality is top-notch, follow these tips:
- Monitor your levels: Keep an eye on your audio levels while recording to avoid distortion or too quiet recordings. Aim for levels that peak around -12 dB for optimal audio quality.
- Eliminate background noise: Choose a quiet location for filming and use blankets, foam, or other sound-absorbing materials to minimize unwanted noise.
- Wind protection: If you're filming outdoors, protect your microphone from wind noise with a foam windscreen or a furry windjammer, also known as a "dead cat."
Remember, great audio can significantly improve the overall experience for your viewers, so don't overlook this crucial aspect of filmmaking.
Using Microphones
Not all microphones are created equal, and choosing the right one for your specific needs is essential. Here are some common types of microphones and their best uses:
- Shotgun mic: Ideal for capturing focused audio from a specific direction, shotgun mics are great for outdoor shoots or situations where the microphone needs to be farther away from the subject.
- Lavalier mic: Also known as a "lapel mic," lavalier mics are small and can be easily clipped onto clothing, making them perfect for interviews or situations where the speaker needs to be hands-free.
- Condenser mic: These mics are sensitive and capture high-quality audio, making them a popular choice for voiceovers or indoor dialogue scenes.
Investing in the right microphone for your needs will elevate your audio quality and help you create a more polished final product.
With a solid understanding of lighting and audio techniques, you're now ready to take your filmmaking skills to the next level. Let's move on to the post-production stage and learn how to edit your cinematic videos like a pro!
4. How to Edit Cinematic Videos
So, you've mastered the art of shooting, lighting, and audionow it's time to bring it all together in the editing process! Editing is where the magic happens, transforming your raw footage into a cohesive and engaging story. In this section, we'll guide you through the steps to edit your cinematic videos like a pro.
Before diving into the actual editing, it's important to organize your footage to streamline your workflow. Here's how:
- Label your files: Give your video clips and audio files descriptive names that indicate their content or scene number. This will make it easier to find specific clips during the editing process.
- Create folders: Sort your files into folders based on scenes, takes, or other logical categories. This will help you quickly locate specific clips and keep your project organized.
- Backup your files: Always make sure to backup your footage and project files. This will protect you from data loss and ensure that your hard work is safe.
Taking the time to organize your footage will save you hours of frustration later on and make the editing process much smoother.
Video Editing Software
Choosing the right video editing software is essential for creating professional-looking cinematic videos. Some popular options for beginners include:
- Adobe Premiere Pro: A widely used and powerful software with a wide range of features and support for various formats. It's great for both beginners and advanced users.
- Final Cut Pro X: A user-friendly software exclusive to Mac users. It offers a sleek interface and a range of powerful features for creating professional-quality videos.
- Davinci Resolve: A versatile and free software with advanced color grading tools and a comprehensive set of features for video editing.
Experiment with different software options to find the one that best suits your needs and preferences.
Editing Tips
Now that you've got your footage organized and your editing software selected, it's time to start cutting your cinematic masterpiece! Here are some tips to help you edit like a pro:
- Trim the fat: Go through your footage and remove any unnecessary or redundant shots. This will make your video more engaging and help maintain a consistent pacing.
- Use cuts wisely: Choose the right type of cut for each transition. For example, a simple straight cut can maintain the flow of the video, while a crossfade can create a sense of time passing or a change in location.
- Keep it smooth: To create a seamless viewing experience, make sure your cuts are smooth and natural. Pay attention to the continuity of movement, sound, and lighting between shots.
Remember, editing is an art formtake your time, experiment, and always keep your audience in mind.
With your video now beautifully edited, it's time to put the finishing touches on your masterpiece. In the next section, we'll explore color grading and effects to make your cinematic video truly shine!
5. Color Grading and Effects
Now that your cinematic video is coming together beautifully, it's time to add the cherry on top: color grading and effects. These final touches can enhance the mood, atmosphere, and overall visual appeal of your video. In this section, we'll guide you through the process of color grading and adding effects to make your masterpiece stand out even more!
Color Correction
Before diving into color grading, it's important to correct any color imbalances in your footage. Color correction ensures that your video has accurate and consistent colors throughout. Here's how to achieve this:
- Adjust white balance: Make sure the white balance is consistent across all shots. This will help maintain a natural color temperature and prevent any color casts.
- Fix exposure issues: Adjust exposure levels to achieve a balanced image. This may involve tweaking the highlights, shadows, and midtones of your footage.
- Improve contrast: Enhance the contrast between the darkest and brightest parts of your video to create a more dynamic and visually appealing image.
By correcting the colors in your footage, you'll create a solid foundation for the next step: color grading.
Color Grading
Color grading is the process of applying a unique color style or "look" to your footage. This can help create a specific mood, enhance visual storytelling, or simply make your video more visually captivating. Here are some tips for effective color grading:
- Choose a color scheme: Decide on a color palette that complements your video's theme, mood, or story. This can be anything from a warm, sun-kissed look to a cool, moody atmosphere.
- Use adjustment layers: Apply your color grading adjustments to an adjustment layer, rather than directly to your footage. This allows for greater flexibility and easier changes later on.
- Experiment with tools: Familiarize yourself with the color grading tools available in your chosen video editing software, such as curves, color wheels, and LUTs (Look-Up Tables). These tools can help you achieve the desired look for your cinematic video.
Remember, color grading is an art form in itselftake your time, be creative, and don't be afraid to try new things!
Adding Effects
Finally, to give your cinematic video that extra "wow" factor, consider adding some visual effects. These can range from subtle enhancements to more dramatic, eye-catching elements. Here are a few ideas to get you started:
- Transitions: Spice up your scene transitions with creative effects like wipes, dissolves, or zooms. Just be sure not to overdo itsubtlety is key!
- Text and titles: Add professional-looking text, titles, or credits to your video. Experiment with fonts, colors, and animation to make them visually interesting and engaging.
- Stylized effects: Consider adding stylized effects like lens flares, light leaks, or film grain to achieve a specific cinematic look or to enhance the atmosphere of your video.
While adding effects can be fun and visually exciting, always remember to keep your audience and story in mind, and avoid adding effects just for the sake of it.
With your video now fully color graded and sprinkled with dazzling effects, you're almost ready to share your cinematic masterpiece with the world! In the final section, we'll cover exporting, sharing, and promoting your video, so you can show off your hard work and skills in shooting and editing cinematic videos.
6. Finalizing and Sharing Your Video
Congratulations, you've made it to the final stretch! After all the hard work you've put into learning how to shoot and edit cinematic videos, it's time to polish your masterpiece and share it with the world. In this section, we'll cover everything you need to know about exporting, uploading, and promoting your video, so you can sit back and watch the views roll in.
Export Settings
Before sharing your video, it's essential to choose the right export settings to ensure your video looks and plays its best. Here are a few key factors to consider:
- File format: Select a widely compatible format such as MP4 or MOV to ensure your video can be played on various devices and platforms.
- Resolution: Choose the appropriate resolution for your video, typically 1080p or 4K, depending on your footage and target audience. Remember, higher resolutions will result in larger file sizes.
- Bitrate: Adjust the bitrate to balance video quality and file size. Higher bitrates will yield better quality but larger files, while lower bitrates will reduce file sizes at the cost of quality.
- Frame rate: Maintain a consistent frame rate throughout your video, typically 24, 30, or 60 frames per second (fps), depending on the look and feel you want to achieve.
Once you've fine-tuned your export settings, give your video a final watch to ensure everything looks and sounds just right.
Uploading to Platforms
Now that your video is ready for prime time, it's time to decide where to share it. There are numerous platforms to choose from, so let's explore a few popular options:
- YouTube: As the largest video sharing platform, YouTube is an excellent place to showcase your cinematic video and reach a wide audience.
- Vimeo: Known for its high-quality content and supportive creative community, Vimeo is a great option for filmmakers and artists who want to share their work with like-minded individuals.
- Social media: Platforms like Facebook, Instagram, and TikTok can help you reach your specific target audience and generate buzz for your video.
When uploading to these platforms, pay attention to their specific guidelines, such as video length, aspect ratio, and file size limits, to ensure a smooth and successful upload.
Last but not least, promoting your video is crucial to attracting viewers and building an audience for your work. Here are some effective strategies to get your video noticed:
- Optimize your title and description: Craft an engaging title and informative description to pique viewers' interest. Don't forget to include relevant keywords, like "How to Shoot and Edit Cinematic Videos," to help your video rank higher in search results.
- Create eye-catching thumbnails: A compelling thumbnail can make all the difference in convincing someone to click on your video. Use high-quality images, bold text, and striking visuals to capture attention.
- Share on social media: Leverage your social media presence to promote your video. Share it with your followers, engage in relevant groups or communities, and consider using paid advertising to boost your reach.
- Collaborate with others: Partnering with fellow creators or influencers can introduce your video to new audiences and help grow your following.
Remember, promoting your video takes time and persistence, so don't be discouraged if you don't see immediate results. Keep refining your strategies and engaging with your audience, and you'll be well on your way to becoming a master at shooting and editing cinematic videos!
If you're eager to dive deeper into the world of cinematic video creation and editing, don't miss the workshop 'Film Production 101: A Beginner's Guide' by Jessy Moussallem. This comprehensive workshop will equip you with the essential skills and knowledge you need to start producing your own captivating cinematic videos with confidence.

